The following content may contain affiliate links. When you click and shop the links, we receive a commission.
While winter is a classic time for indoor activities, I find that the summer months can also provide a lot of indoor time with the kids. Whenever it’s boiling hot outside, raining, or a storm is blowing through, my kids end up stuck inside and destroying the house. In my opinion, it’s just as important to have some crafts on hand during these times as it is in the winter!
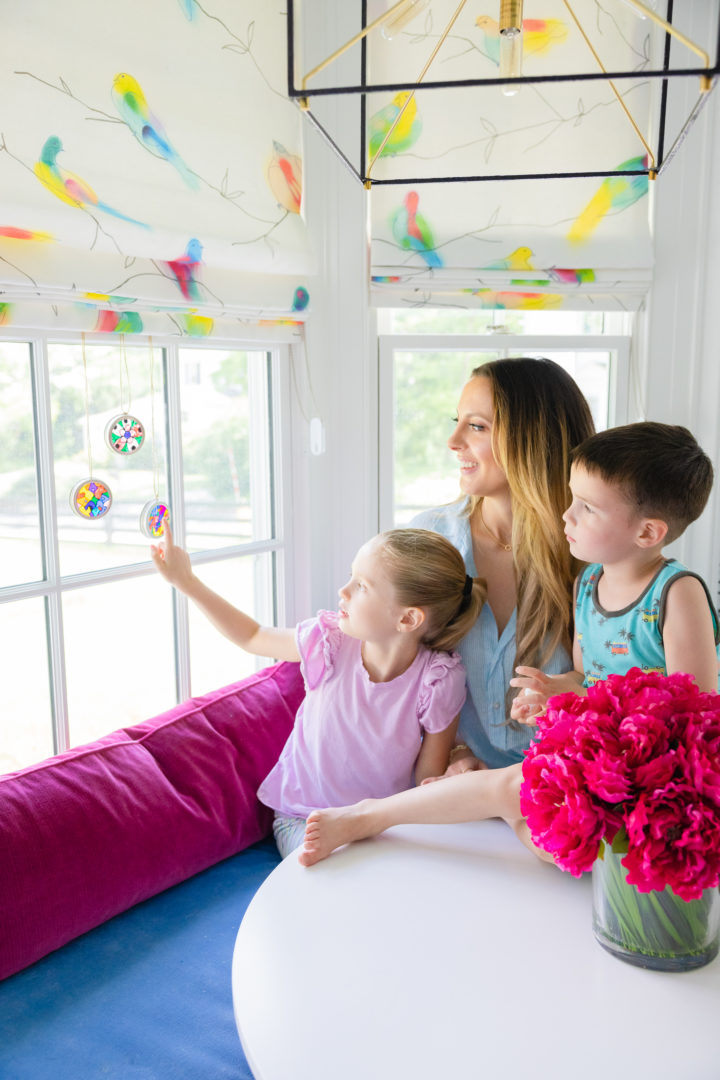
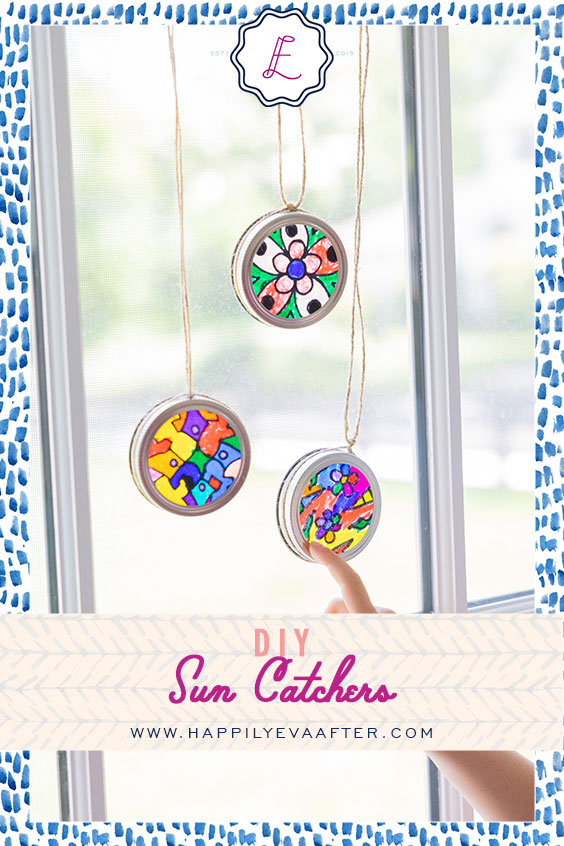
We recently made DIY Sun Catchers with the kids, and it was SO fun. The materials for these are really inexpensive and simple, and potentially things you already have on hand. I didn’t even have to go out to get everything! If your kids have a lot of patience with drawing, you can just let them spend time decorating their circle and filling it all the way up with color. I knew that my kids would lose interest in having to do this themselves, so I actually prepared the circles with a black sharpie the night before, and designed patterns that almost looked like a blank coloring book. Then, they spent time the next morning filling it up with the colors.
After applying the oil and hanging them, they looked like gorgeous little stained glass decorations! I LOVE how these turned out. My kids have mentioned multiple times to me how much they loved making them, and we will definitely be recreating these all summer long during bad weather!

Materials…
- Basic White Printer Paper
- Mason Jar Lids
- A Sharpie
- Cooking Oil (You can use any kind, but I used Olive Oil!)
- Cotton Balls
- Scissors
- Twine
- Glue
Step 1
Prep
First, trace the mason jar lids on top of a piece of white printer paper, and then cut out the circles.
Step 2
Outline Design
Next, take your sharpie and draw the outline of a design (kind of like you’re making a coloring book).
Step 3
Color
Now have your kiddos fill in the designs!
Step 4
Oil
Once your designs are colored in, take a cotton ball and apply a thin layer of oil to the art. The design should be covered completely, but you don’t want it to be soaked, so be sure to remove any excess oil with a paper towel, and allow to dry for 5 minutes.
Step 5
Glue
Apply some glue to the inside of the mason jar lid and gently place the finished and oiled design on top of the glue, facing outwards.
Step 6
Hang
Tie some twine around the mason jar lids and knot it, making sure to leave a few inches of extra twine on the ends so you can hang your final product!
Shop the post…
[show_shopthepost_widget id=”4940878″]

I love how simple yet creative this sun catcher project is. It’s such a perfect way to keep kids entertained while using things we already have at home. The idea of turning everyday items into something that feels magical really resonates with me as a parent always looking for easy, meaningful activities. And when the crafts are done and the kids want a break, I sometimes let them relax with a few fun casual games over at taptapshots.net, which keeps the mood light and playful.