The following content may contain affiliate links. When you click and shop the links, we receive a commission.
Happy Earth Day!! I was just chatting with a girlfriend of mine about what a big deal was made of Earth Day when we were kids. It seemed like there was a whole month-long celebration with lots of events, special curriculum, and even thematic fashion looks (We both had at least one Earth Day Tshirt in our arsenal. Ok, I had four) But nowadays, Earth Day seems like just a red date on our calendars with little to no fuss in mainstream culture. I hate that! More than ever, it’s important to celebrate our natural resources as well as educate our kids and ourselves as to the best practices for preserving the planet for generations to come. This year I wanted to do my small part by creating a fun kid-friendly DIY that takes in to consideration both plant life and recycling!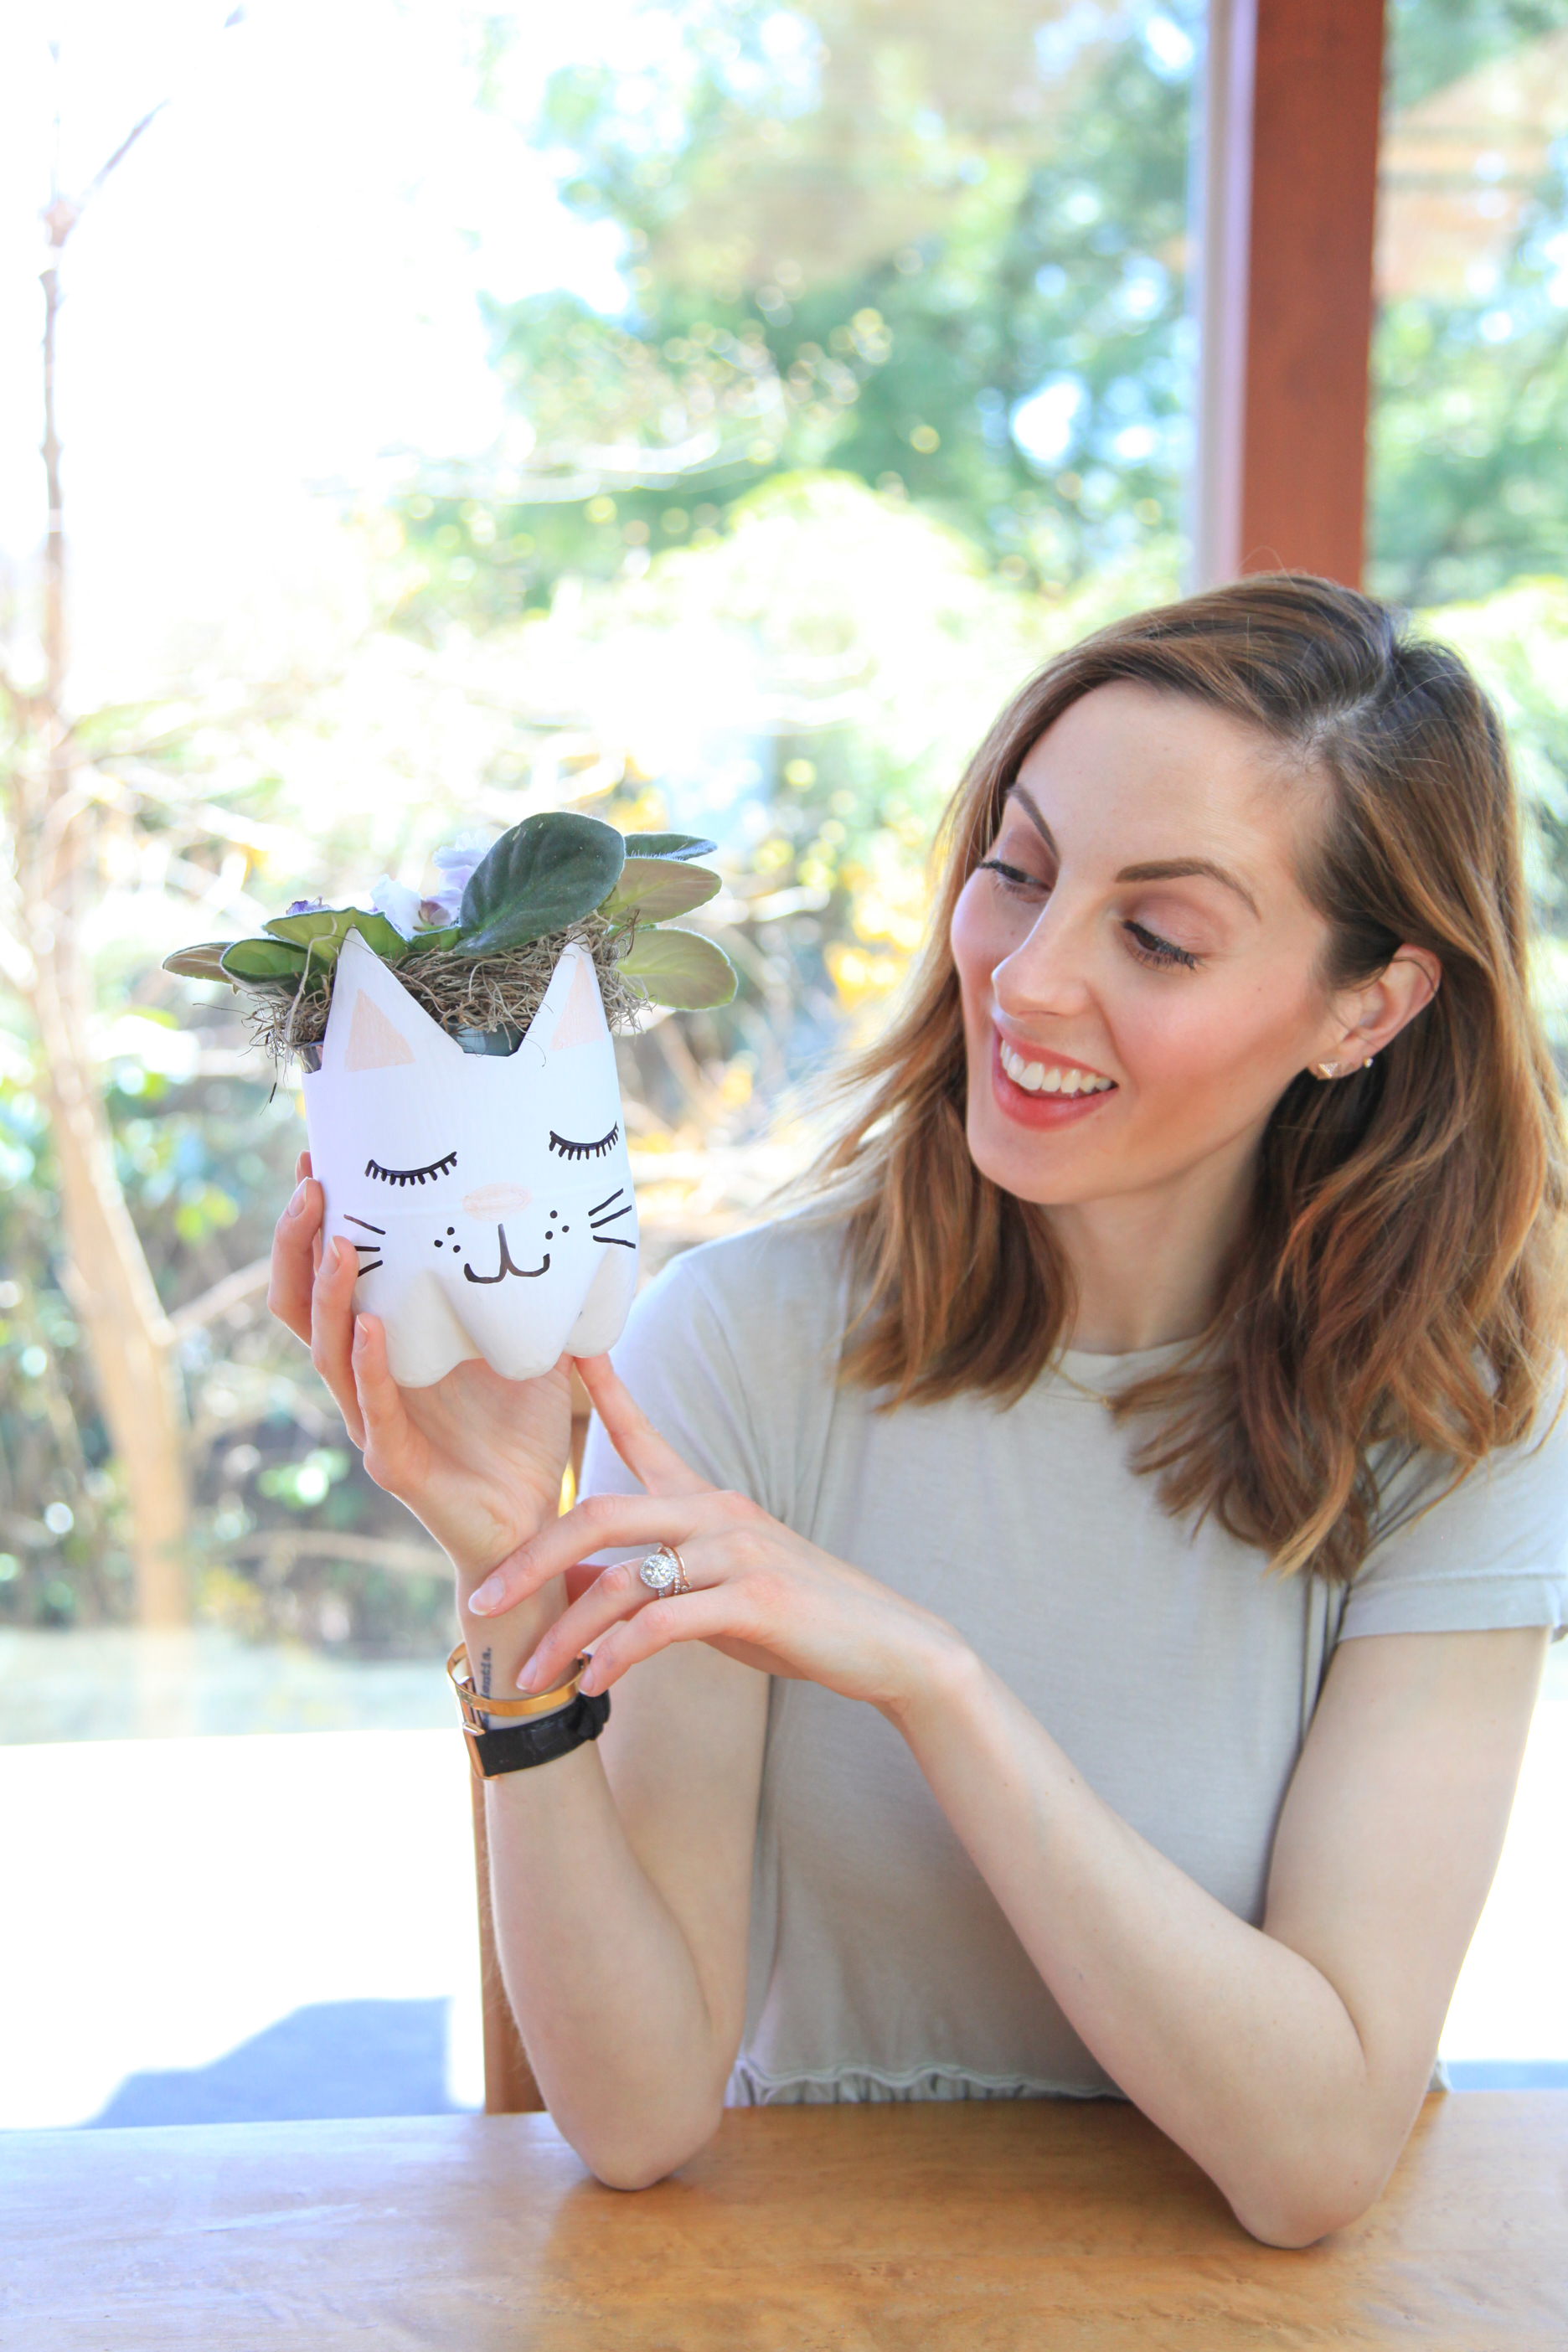
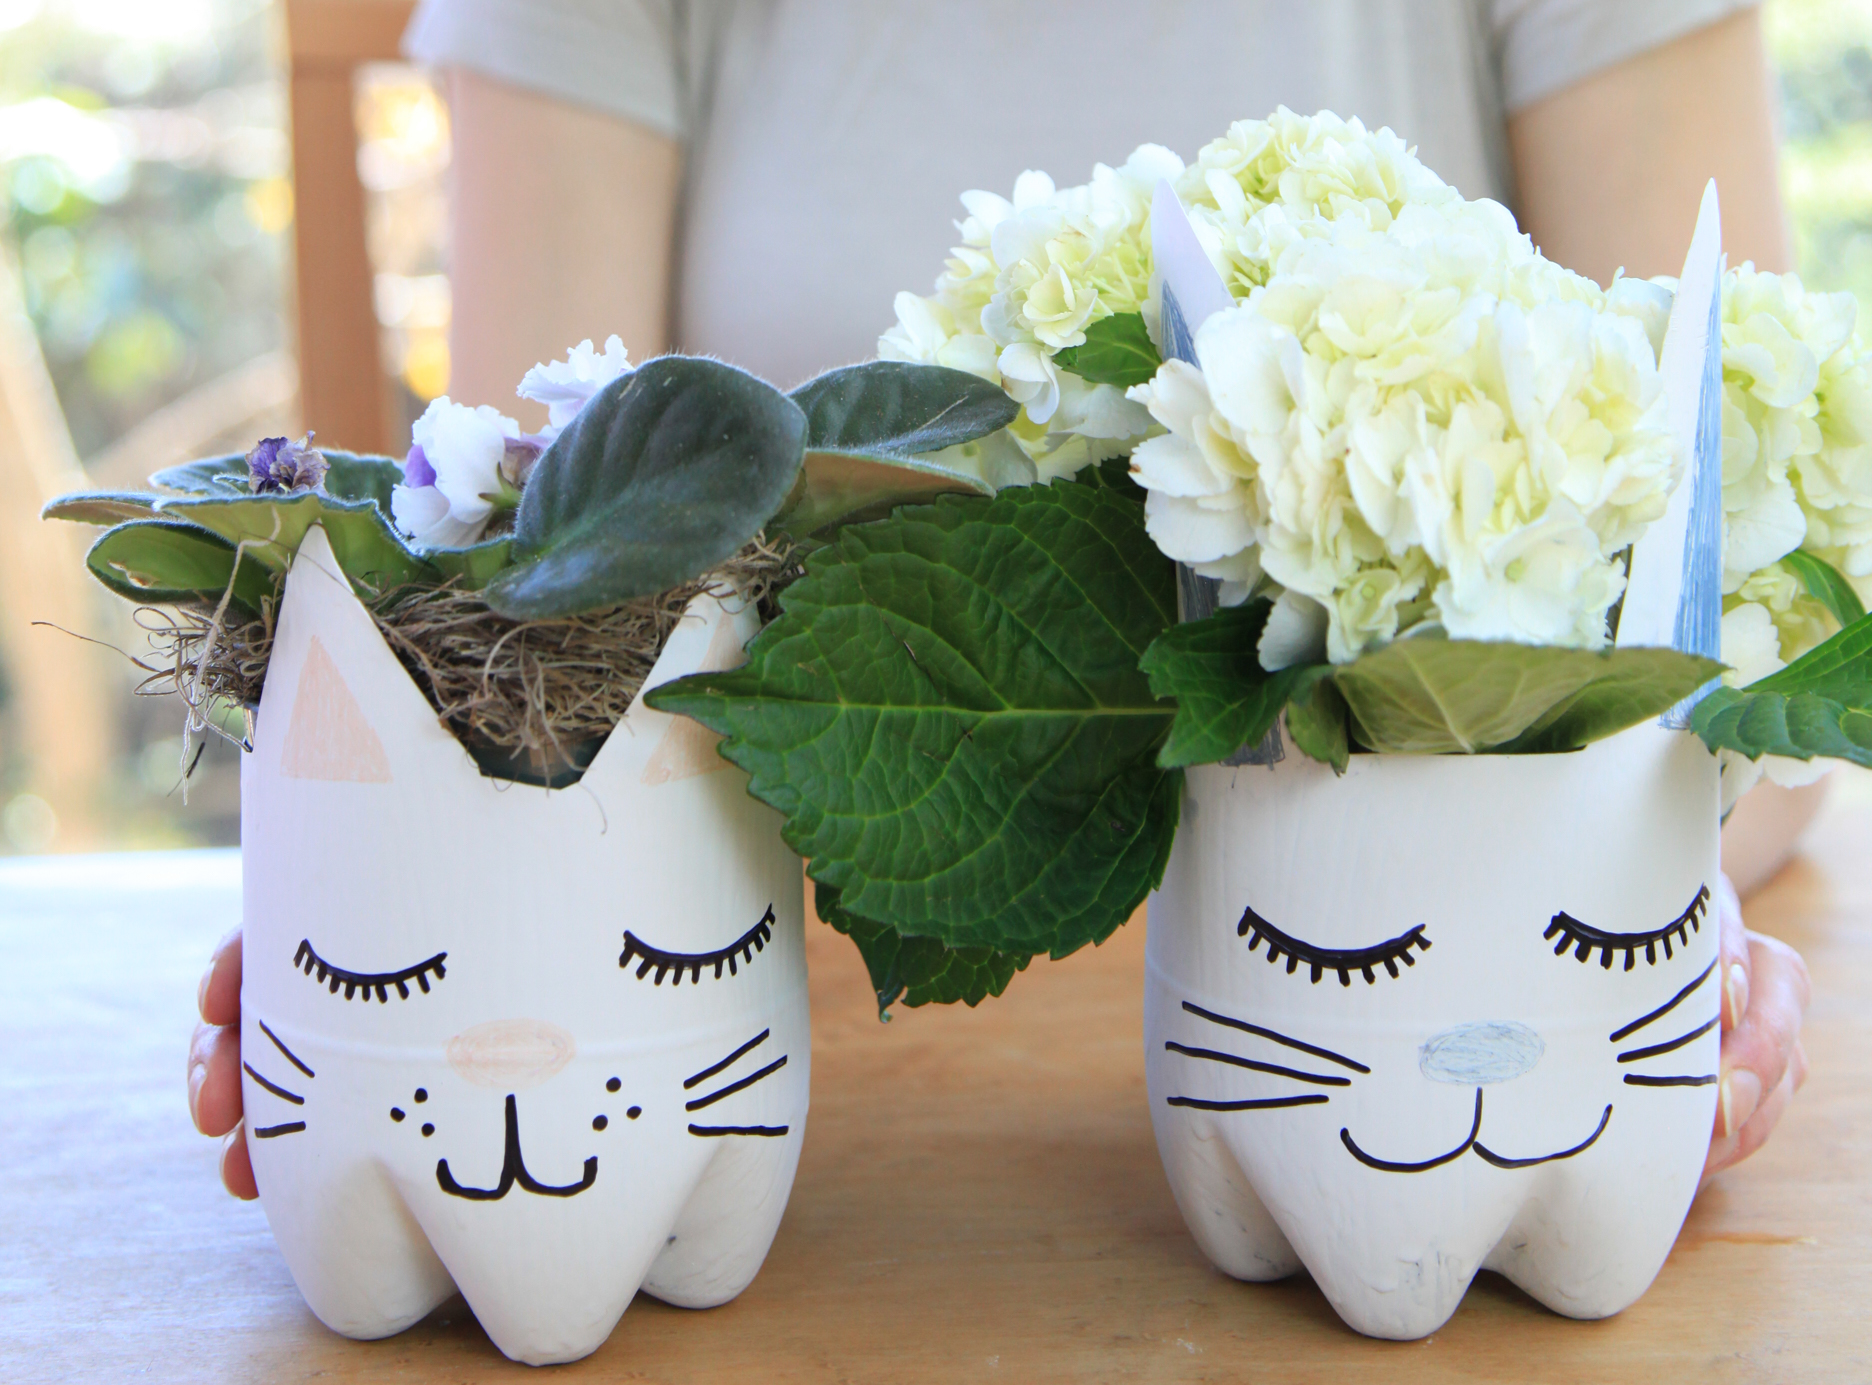
These DIY recycled bottle planters are super easy to make, and utilize trash to create something adorable in its place– all while sustaining new green life for the planet. What more could we ask for this Earth Day?! All you need is an empty soda bottle, some scissors, white paint, a sharpie, and colored markers or pencils and you are ready to do your part. One, two, three…Grow!
You Will Need:
- 1 empty Liter Soda Bottle, rinsed and dried
- sharp Scissors
- White opaque paint (I use matte white paint from the hardware store)
- 1 paintbrush
- 1 Sharpie indelible black marker
- Assorted colored markers or pencils
- 1 potted plant, or soil and seeds for planting!
Directions:
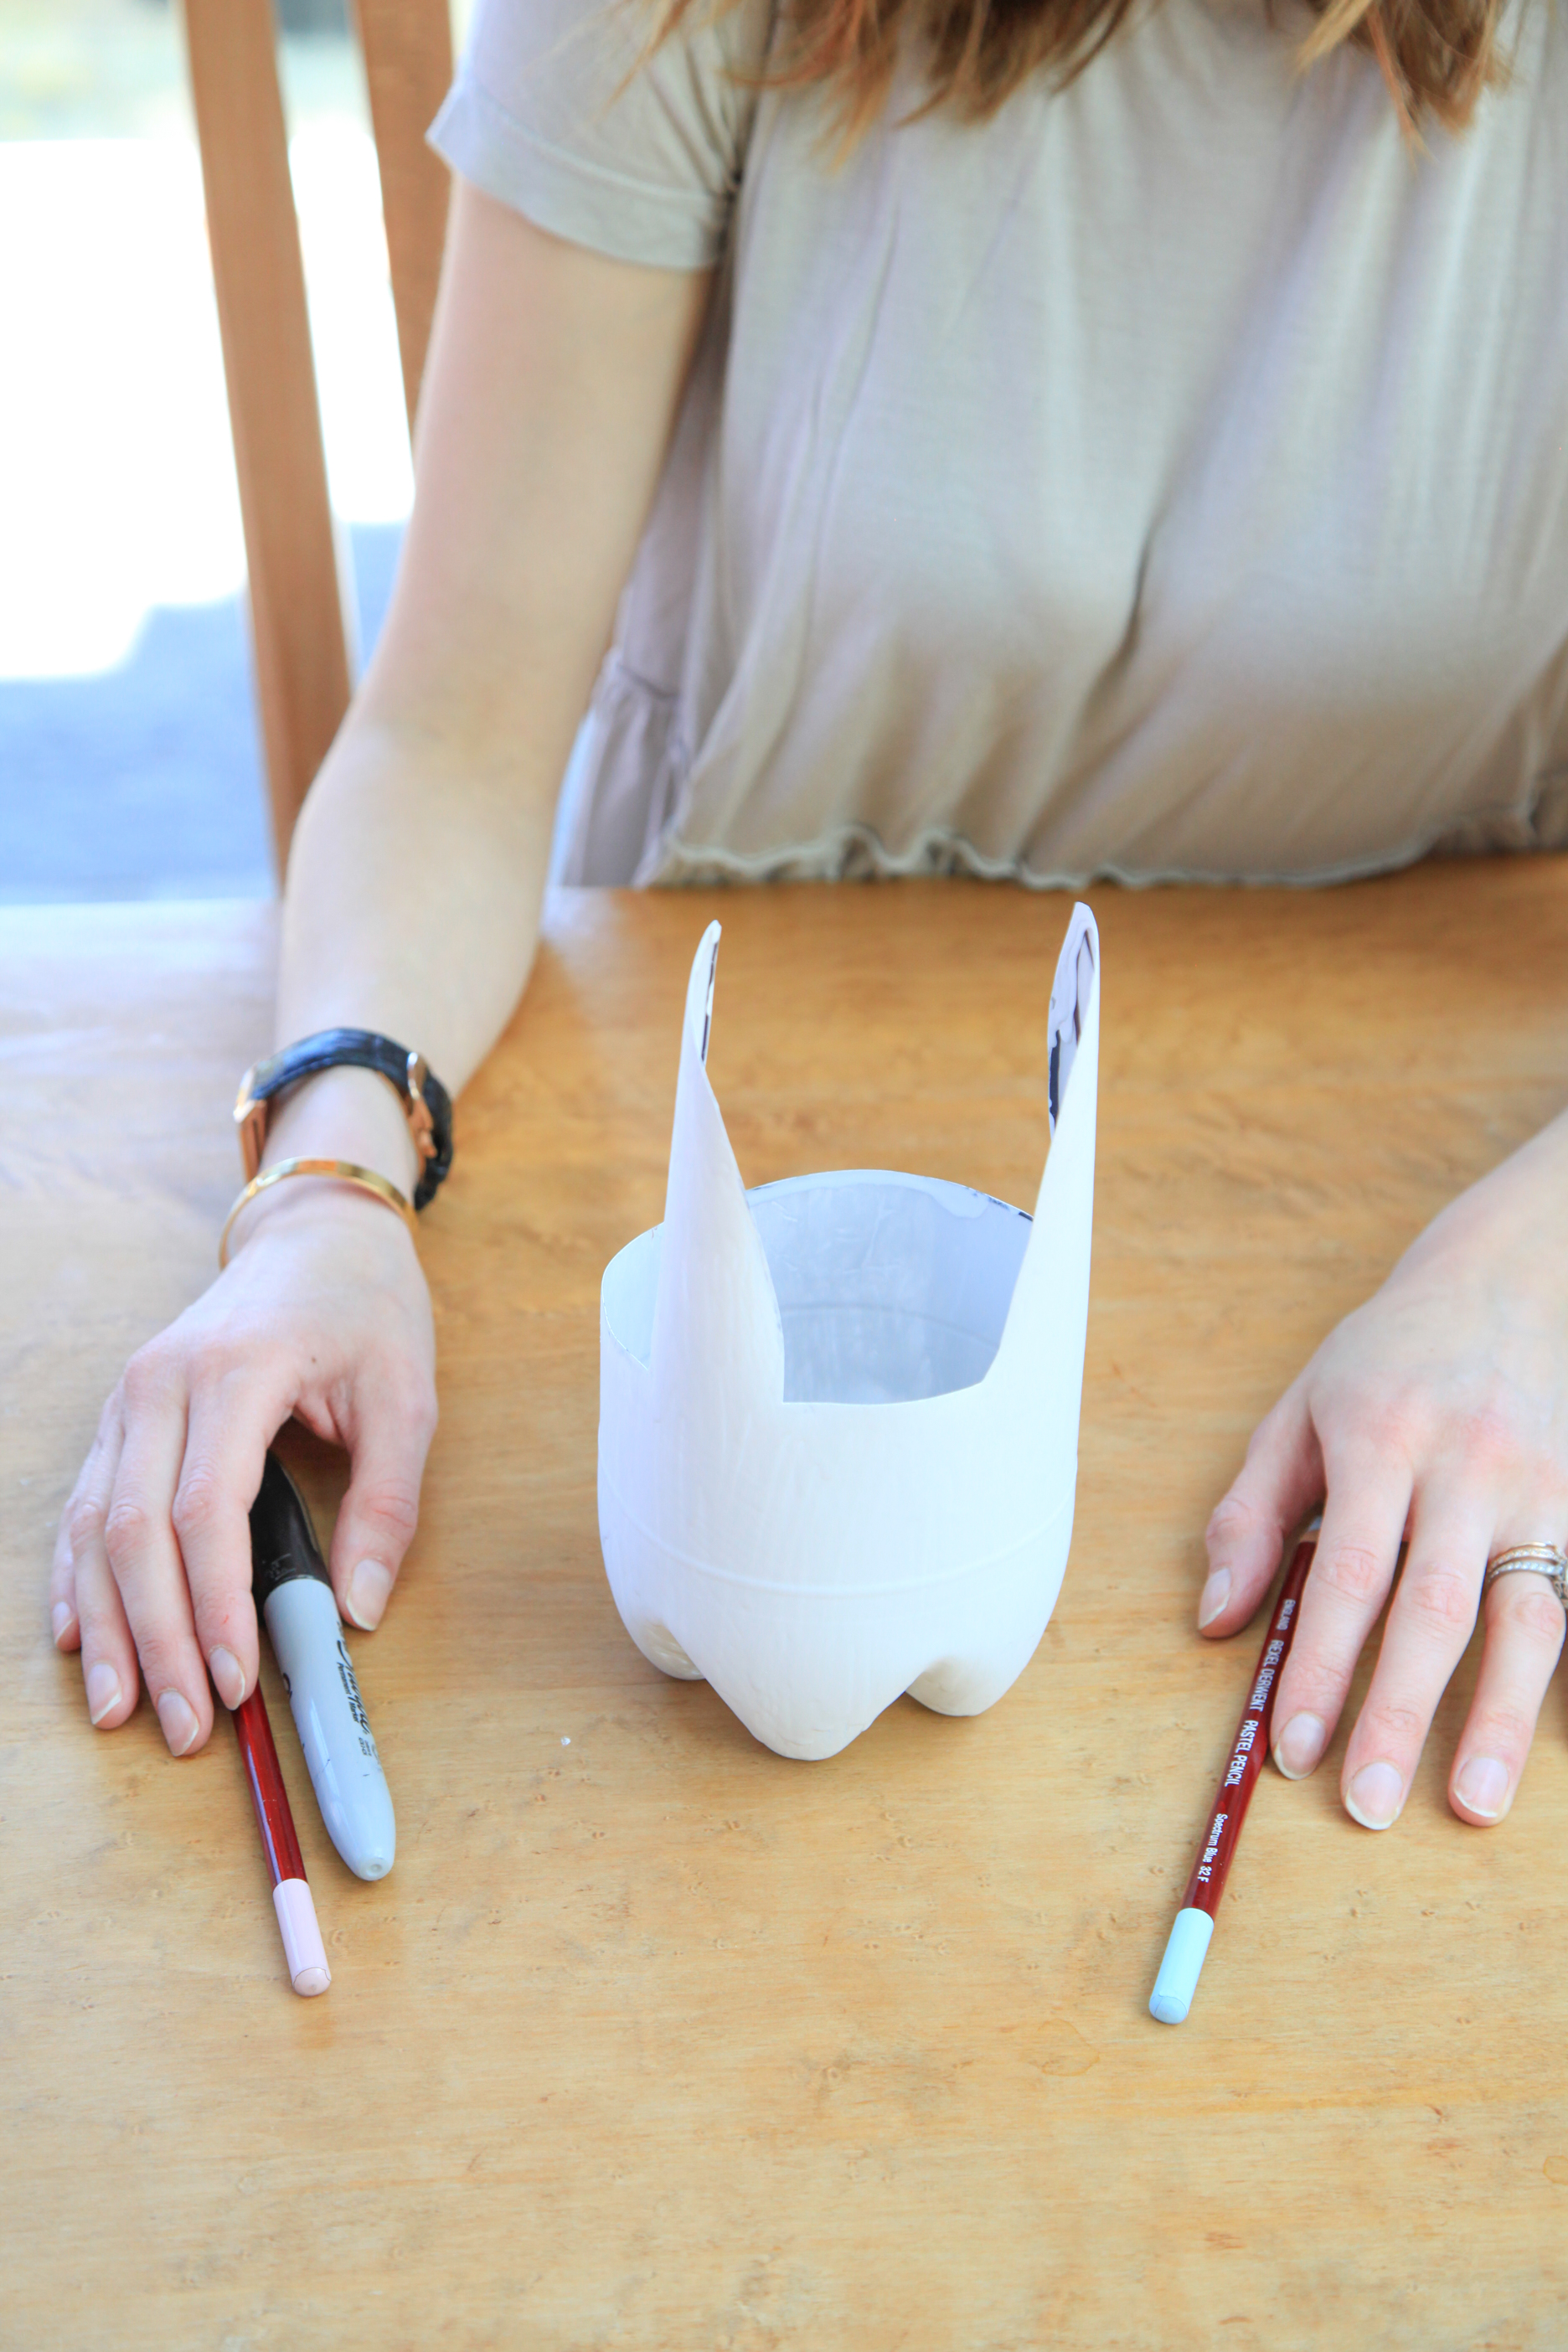
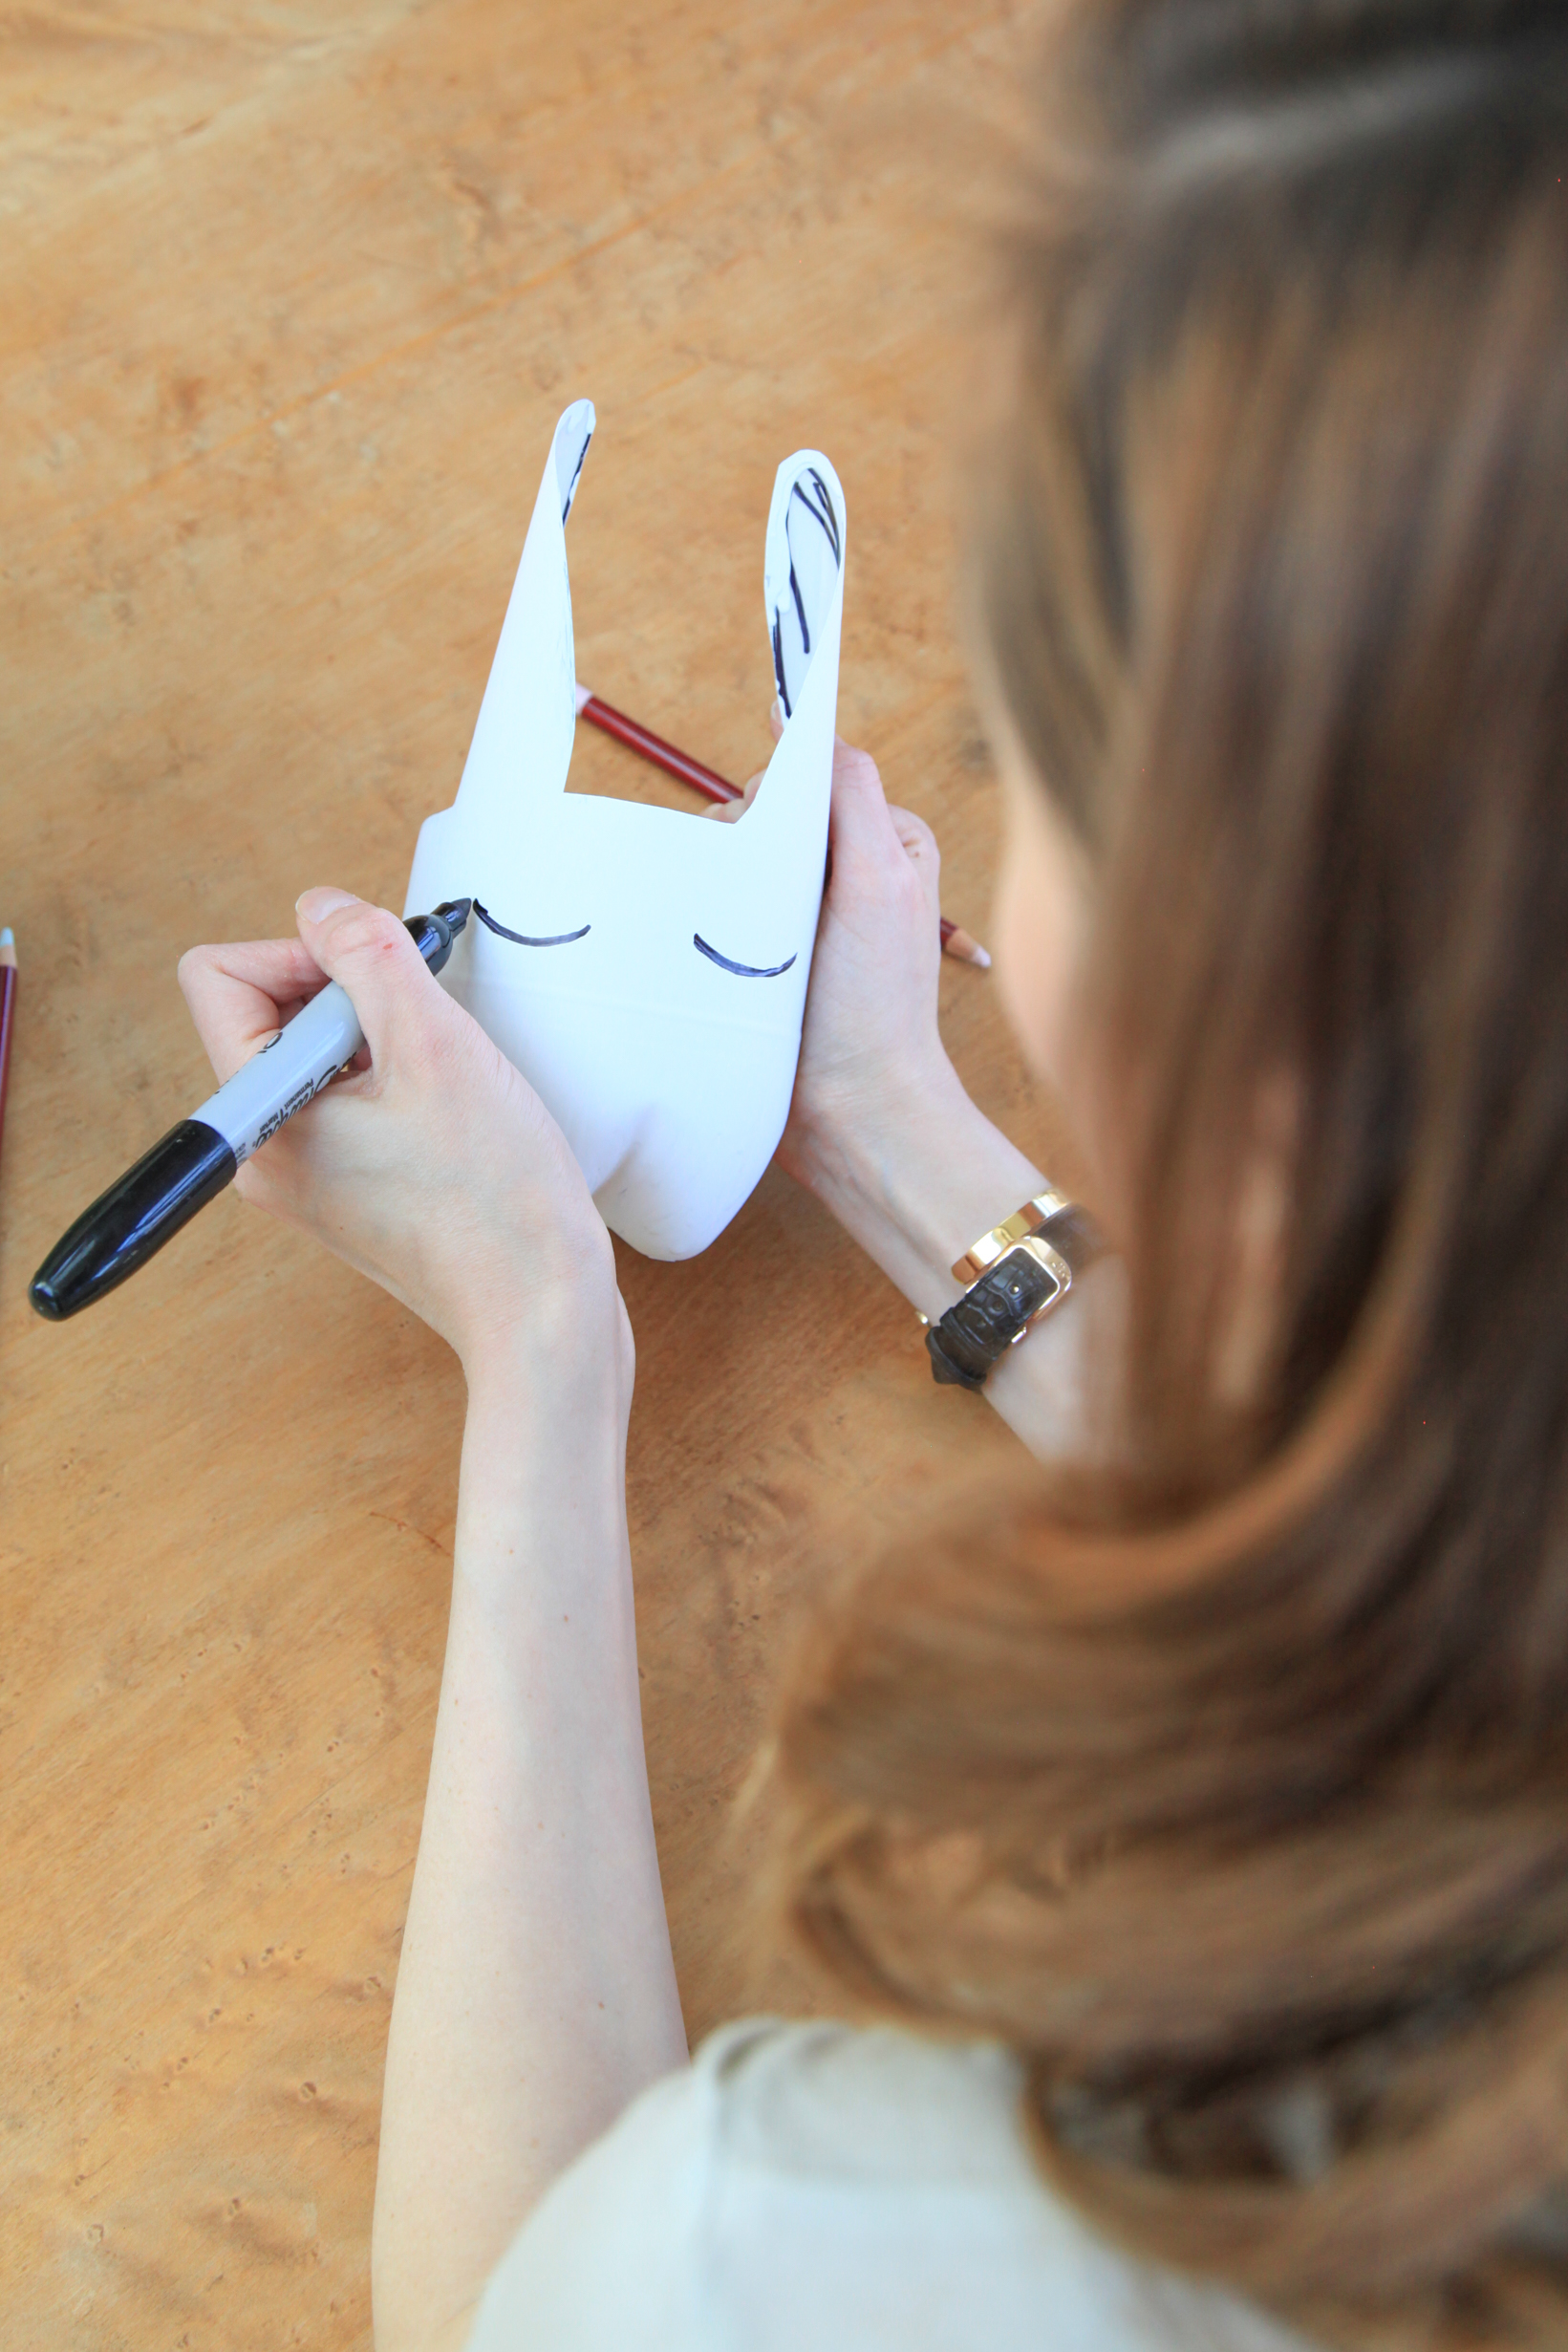
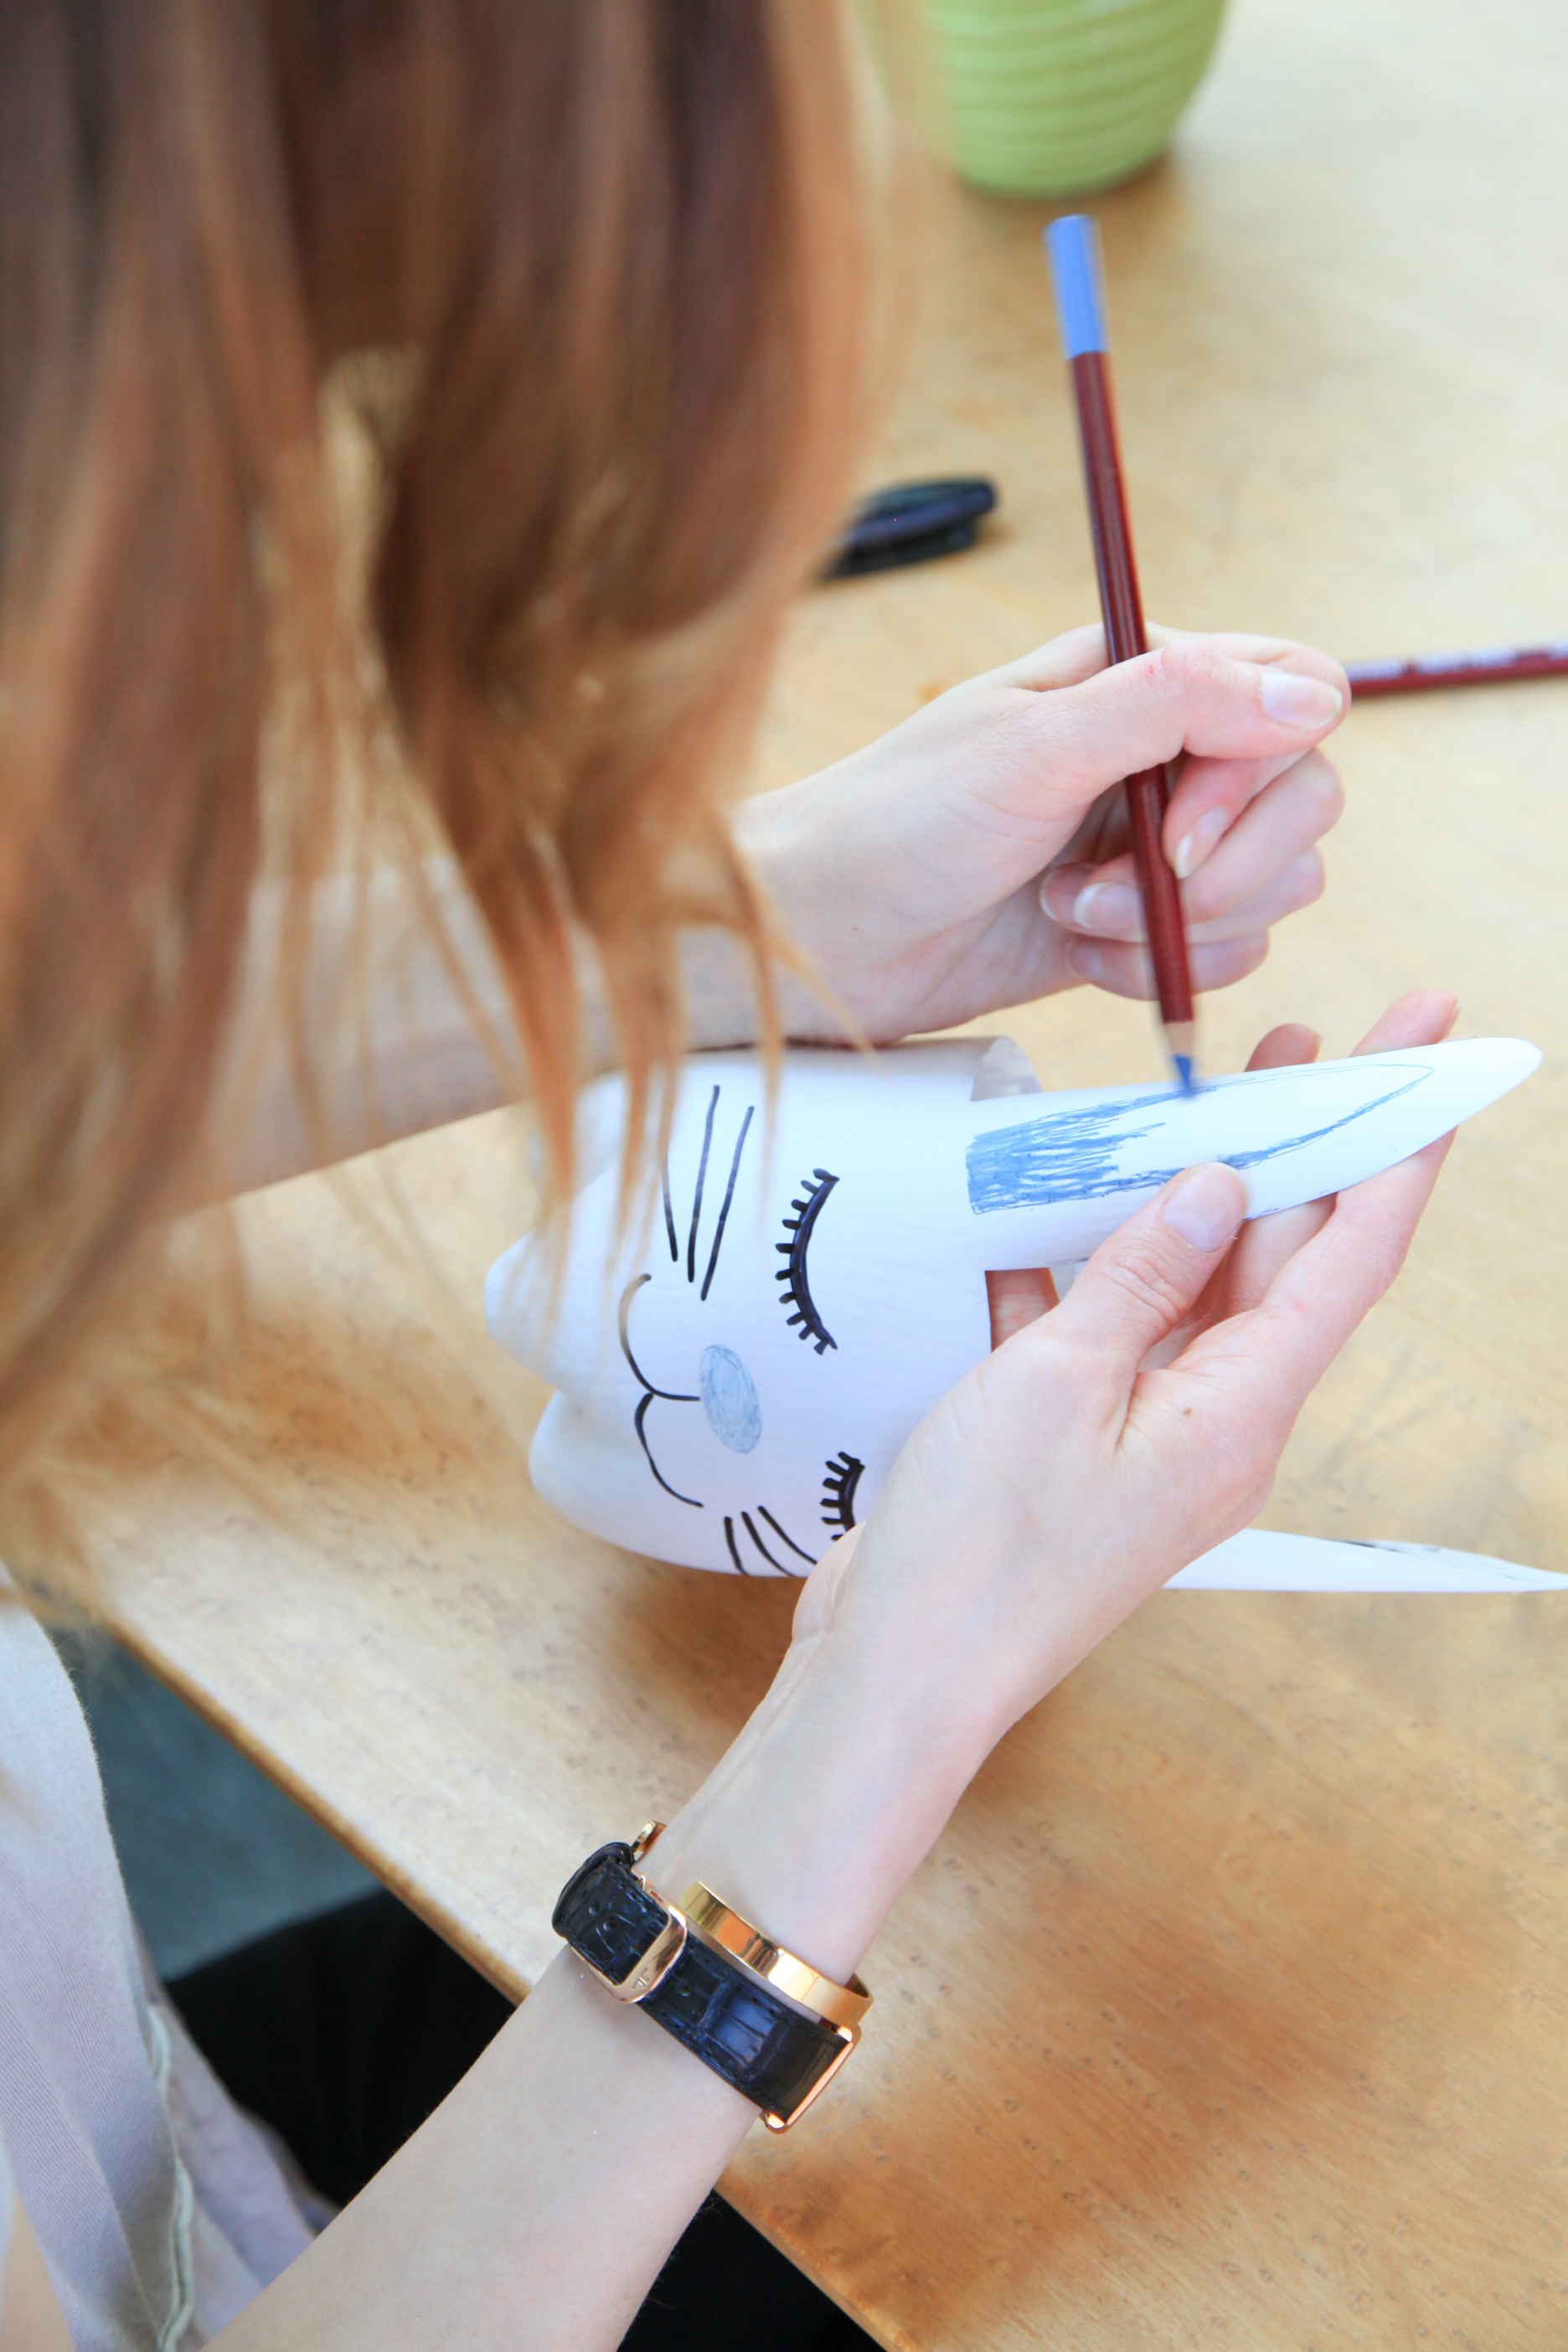
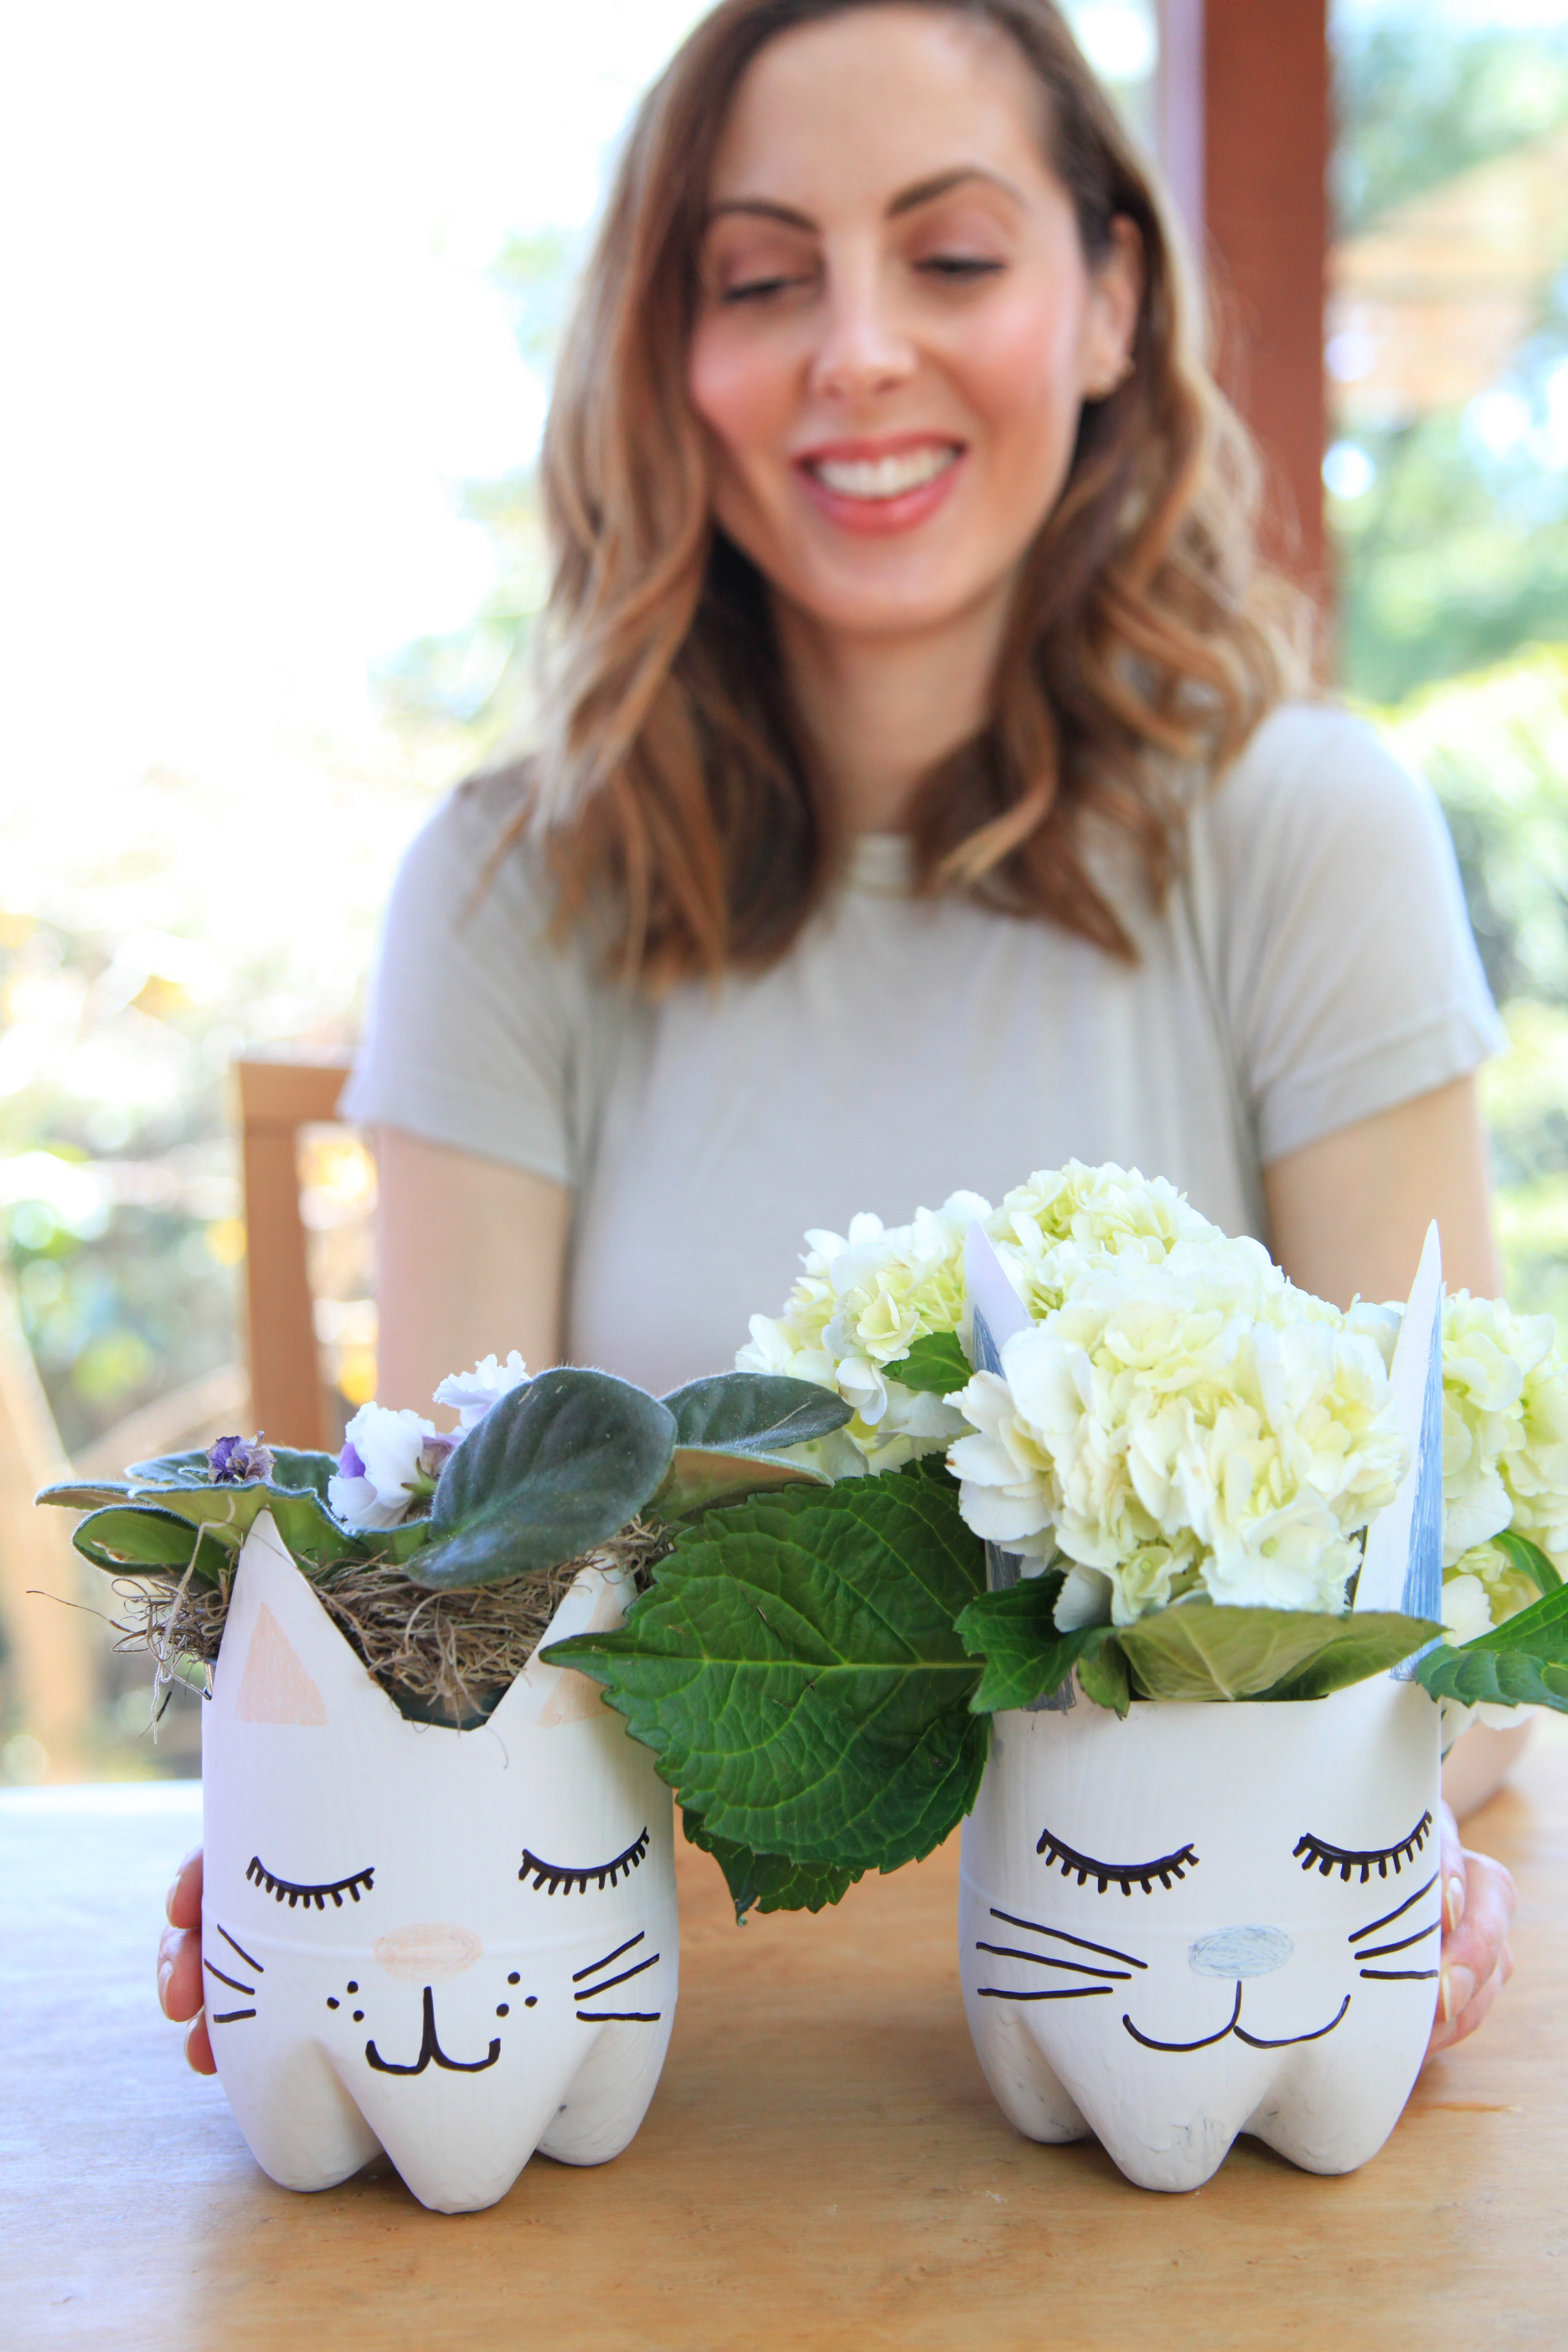
Begin by cutting out your shape. I sliced the top spout part off of the bottle, and then drew the shape of the animal I wanted to make with a sharpie before cutting in to the bottle with my scissors. Get creative with your shapes! I used a kitty and a bunny rabbit here (two of Marlowe’s current favorites) but it would also be cute to do a princess planter and have the top be triangular ridges of a pretty crown!
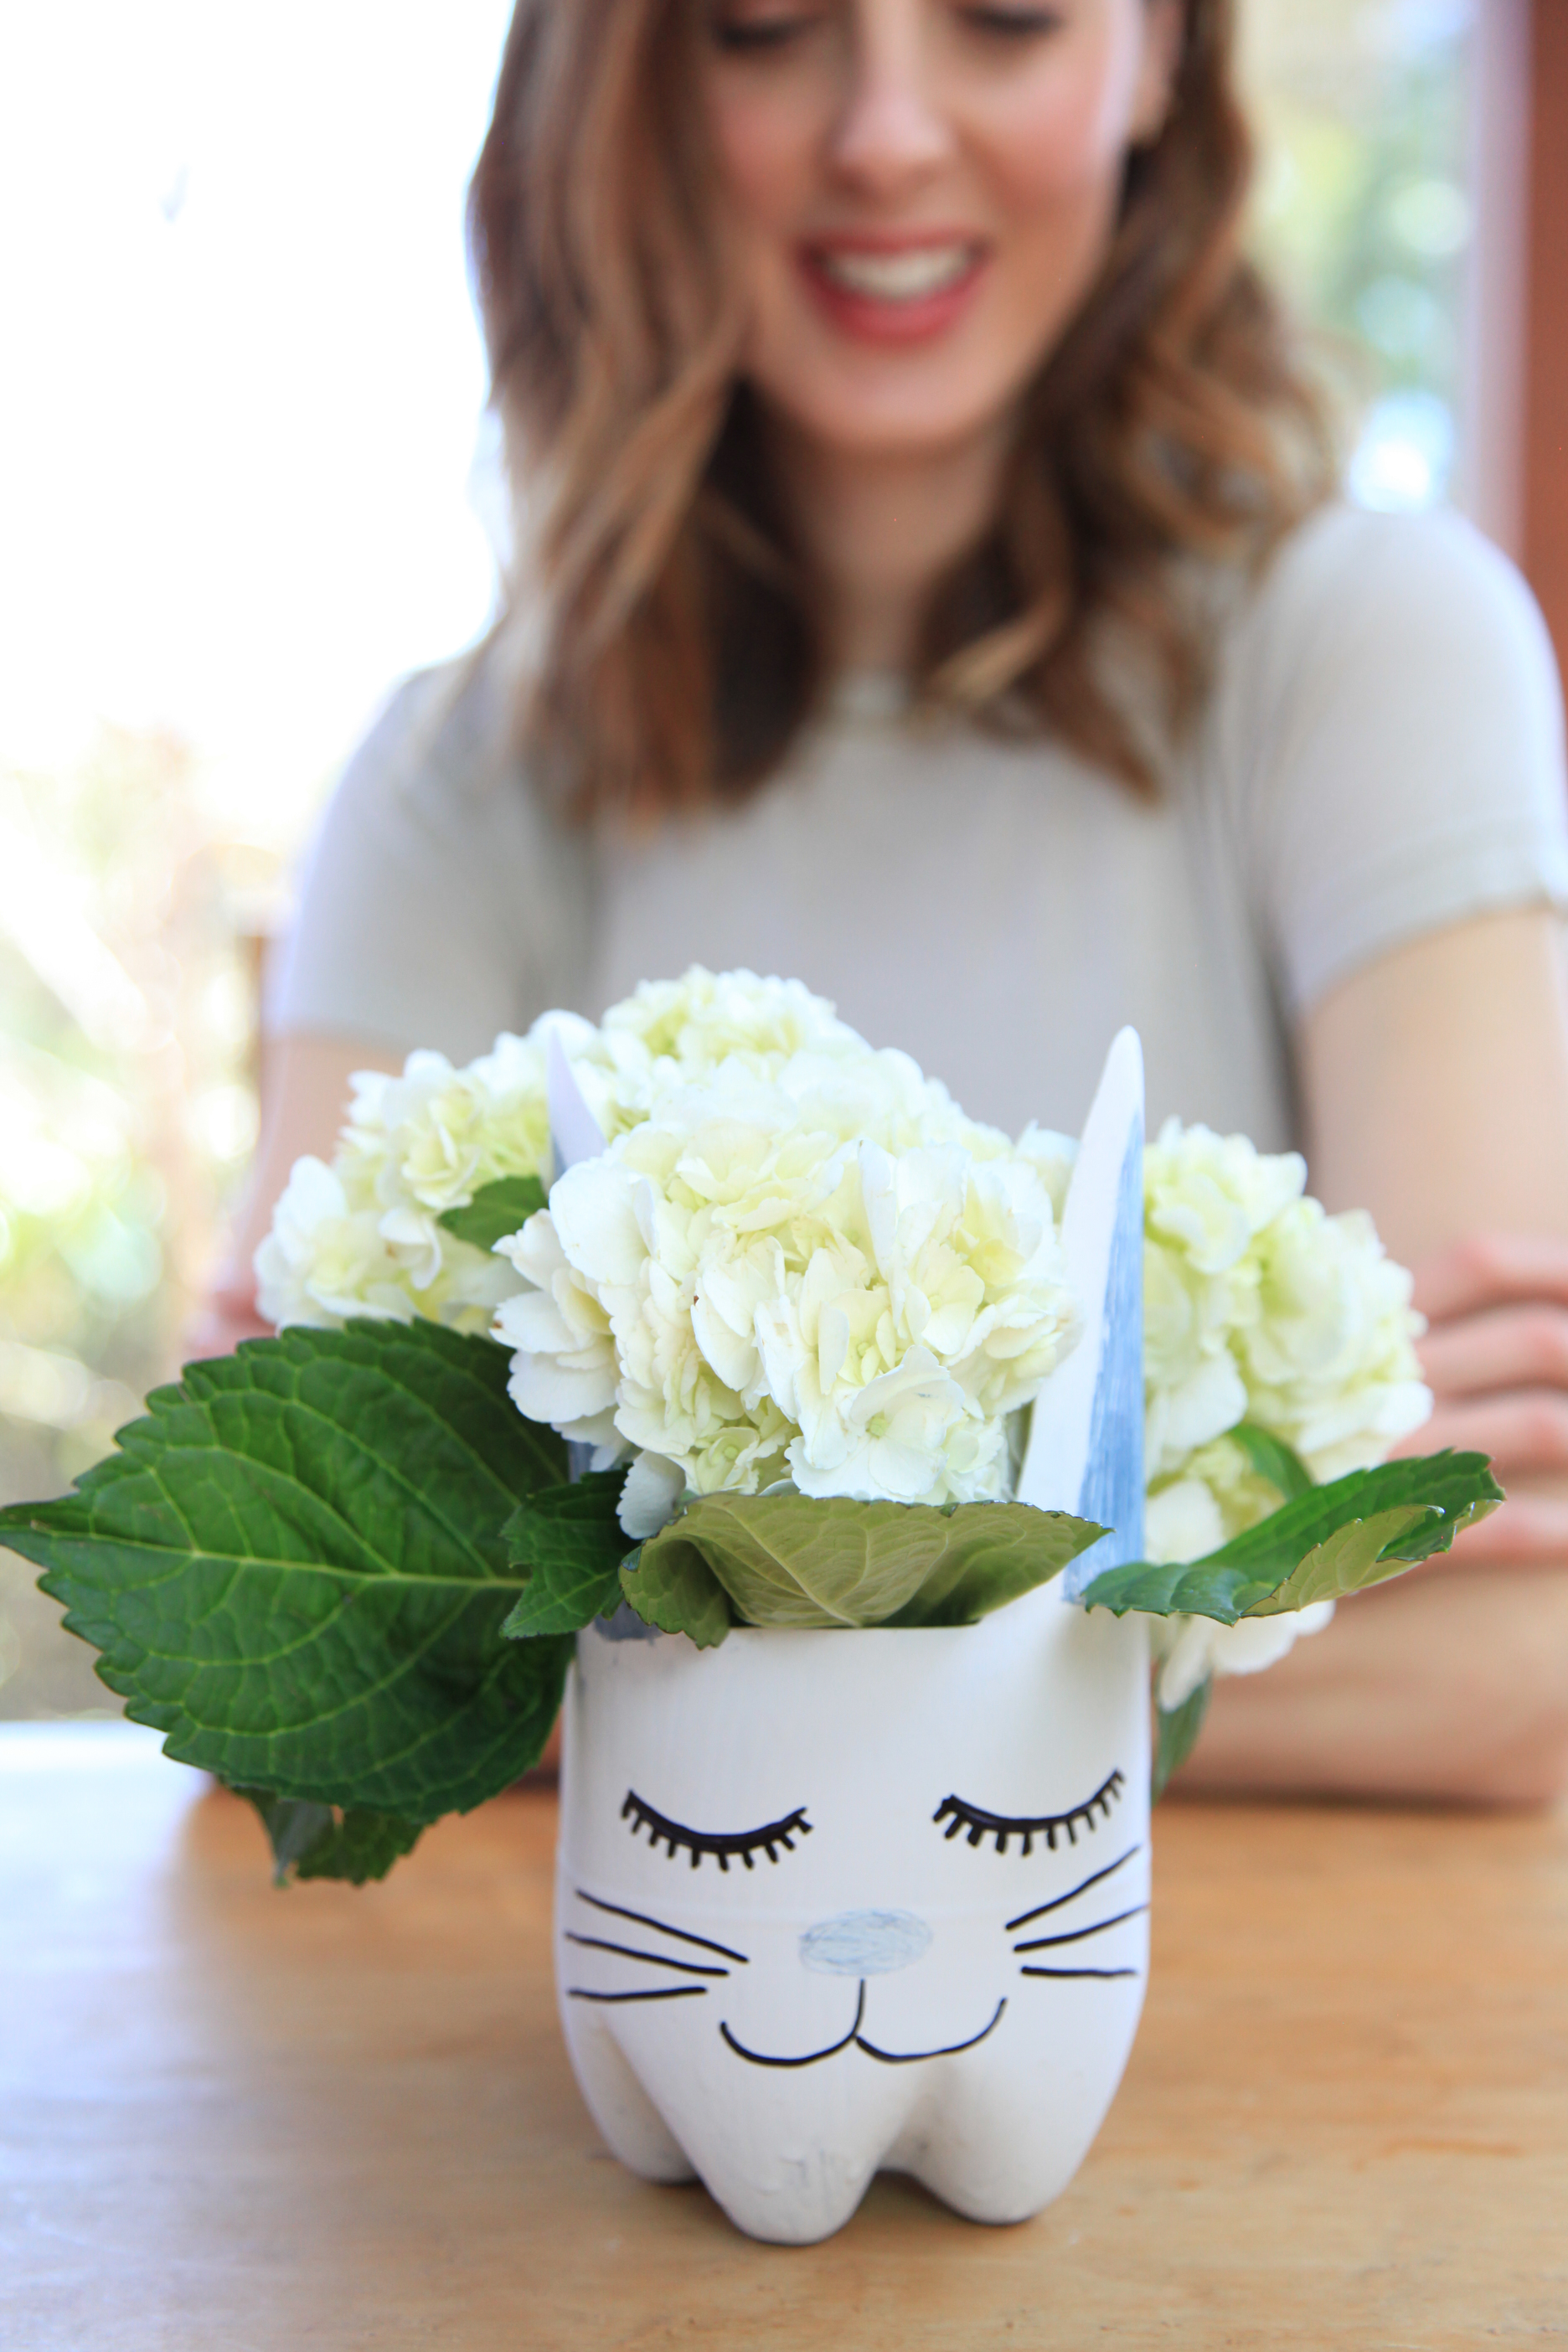
Next, paint your planter. I used two coats, and dried for about three hours in between coats. Make sure when you are finished painting your planter that you allow it to dry for at least six hours or overnight to make sure it is absolutely bone dry before you decorate! Now, decorate away! I liked using colored pencils because they gave the colors a softer look, but I think a super bright and festive planter decorated with Marker would be awesome too. Fill the planter with a potted plant that has been removed from its previous planter, plant seeds in moist soil, or simply use it as an easy and inexpensive vase to display beautiful flowers!
Photographs by Anel Dzafic
How cute.
http://www.rsrue.blogspot.com
Hi:
This is such a great idea! It is creative, and gives people a fun way of creating something that helps the environment! I also love how you used a soda bottle to do it. I usually just recycle them, but this idea takes it to another level. You have such a great vision, everything you touch turns into something beautiful.
Thank you for sharing ?
Thanks, Shahed! What kind words! I’m glad you liked this DIY, I think it’s great for kids (and even grownups!), and so important to remember we can recycle plastic to make beautiful things
xo
EAM
Fun Idea & a great way to teach the little ones about recycle & repurpose with a creative twist!
Thanks, Vicky!
It really is amazing for the kids to watch an ugly empty soda bottle being turned in to something beautiful! 🙂
xoxo
EAM
Hi Eva. This is a beautiful and creative project. I will try it out with the children I mentor here in Nigeria. Kudos!
Hi there! I love hearing that, and can’t wait to see how they turn out! Please send a picture along if you make them!
xoxo
EAM