The following content may contain affiliate links. When you click and shop the links, we receive a commission.
This blog post was originally published on December 12th, 2019.
’Tis the season for baking up some fabulous deliciousness! At least I’m pretty sure that’s the technical term. LOL. For me, holidays are synonymous with indulgence, and no more so than the Christmas season. I’m admittedly not the most committed baker—I much prefer cooking to baking—but I have tested and loved some recipes over the years that I come back to because they are delicious and not overly challenging. The holidays are the perfect time to try out new recipes, and maybe even create some culinary traditions of your own!
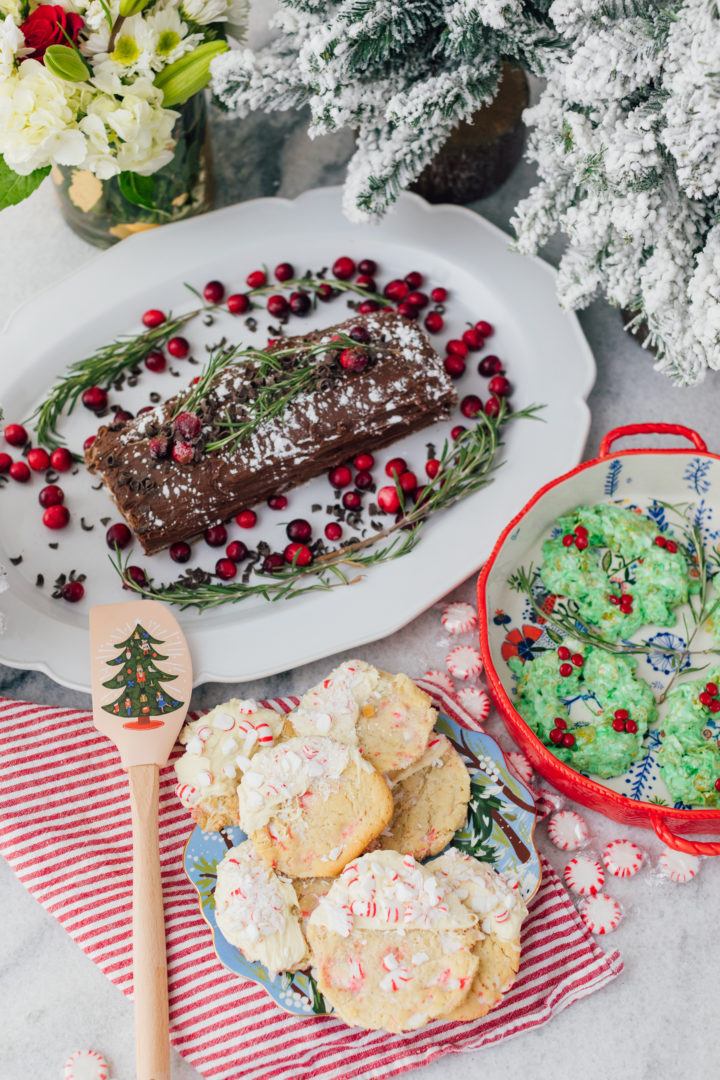
Today I wanted to share three delicious Christmas dessert recipes that I’m making this year for my family—and they are all at different levels of difficulty and presentation! I included one treat that is dairy-free and no-bake, one that is Pinterest-worthy but EASY, and a more “advanced” option. All are delish! I hope you love these treats as much as we do!

CHRISTMAS DESSERT #1:
WHITE CHOCOLATE DIPPED PEPPERMINT CRUNCH COOKIES
This is a great simple Christmas dessert recipe for those who don’t have time to bake sugar cookies from scratch, but leaves the options to use your own recipe if desired!
Ingredients…
(Makes 24 cookies)
- 1 16oz. sugar cookie mix
- ¼ cup all-purpose flour
- 8 peppermint candies, crushed (you can also use candy canes!)
- 2 cups white chocolate baking chips
- ½ tsp coconut oil
Instructions…
- Preheat oven to 350º F and line baking sheets with parchment paper.
- To crush the peppermint candy, put them in a large Ziploc bag, and crush them using a frying pan or cooking mallet.
- Next, mix your cookie dough according to the package instructions.
- Once you have your cookie dough, place it into a mixing bowl and slowly stir in the flour and ⅓ cup of the crushed candy until combined.
- Shape dough into 1-inch balls and place 2-inches apart on the baking sheets.
- Bake according to the cookie dough package instructions, until the cookies are golden brown on the outside.
- Remove the cookies from the oven and let them rest until completely cooled (usually about 30 minutes).
- Add the white chocolate baking chips and the oil into the microwave-safe bowl, and microwave on high for 1-1½ minutes, stirring every 30 seconds until smooth.
- Once the chocolate is melted, dip in half of each cookie, allowing the excess chocolate to drip off, and place on parchment paper.
- Sprinkle the dipped half of the cookies with the remaining crushed candy, let stand until dry (about 15 minutes) and enjoy!

White Chocolate Dipped Peppermint Crunch Cookies
Equipment
- Large Baking Sheet
- Parchment Paper
- 1 Mixing Bowl
- Cooling Rack
- 1 Medium Microwavable Bowl
- 1 Small Bowl
Ingredients
- 16 oz sugar cookie dough
- 1/4 cup all-purpose flour
- 8 peppermint candy, crushed
- 2 cup white chocolate baking chips
- 1/2 tsp coconut oil
Instructions
- Preheat oven to 350º F and line baking sheets with parchment paper.
- To crush the peppermint candy, put them in a large Ziploc bag, and crush them using a frying pan or cooking mallet.
- Next, mix your cookie dough according to the package instructions.
- Once you have your cookie dough, place it into a mixing bowl and slowly stir in the flour and ⅓ cup of the crushed candy until combined.
- Shape dough into 1-inch balls and place 2-inches apart on the baking sheets.
- Bake according to the cookie dough package instructions, until the cookies are golden brown on the outside.
- Remove the cookies from the oven and let them rest until completely cooled (usually about 30 minutes).
- Add the white chocolate baking chips and the oil into the microwave-safe bowl, and microwave on high for 1-1½ minutes, stirring every 30 seconds until smooth.
- Once the chocolate is melted, dip in half of each cookie, allowing the excess chocolate to drip off, and place on parchment paper.
- Sprinkle the dipped half of the cookies with the remaining crushed candy, let stand until dry (about 15 minutes) and enjoy!
Nutrition
CHRISTMAS DESSERT #2:
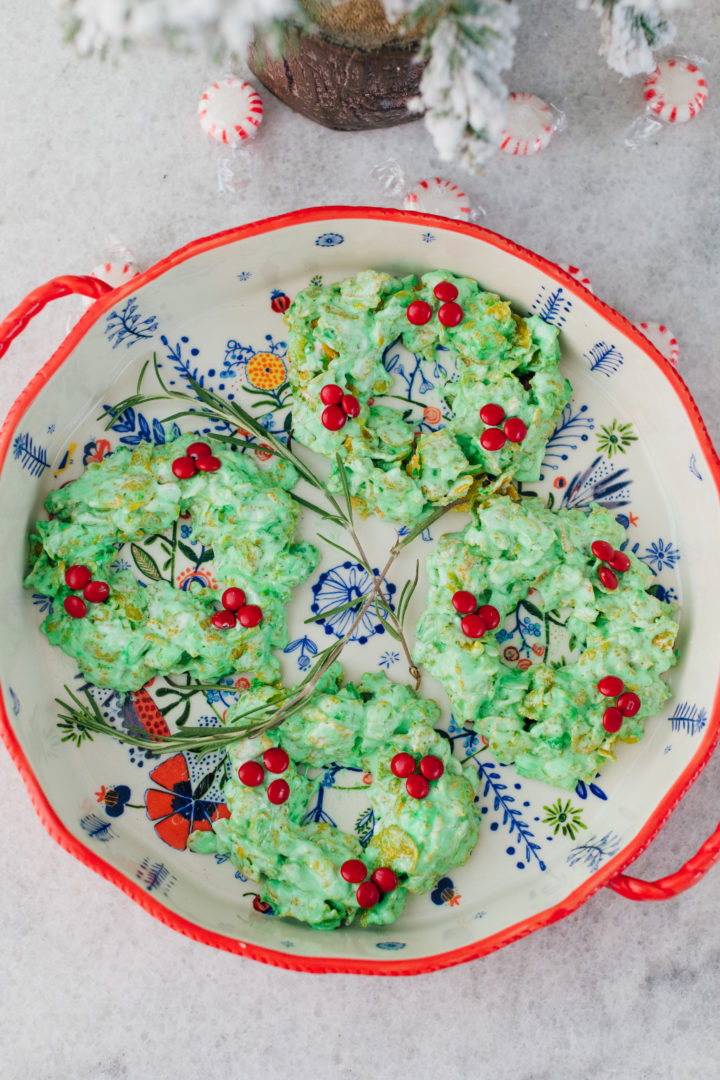
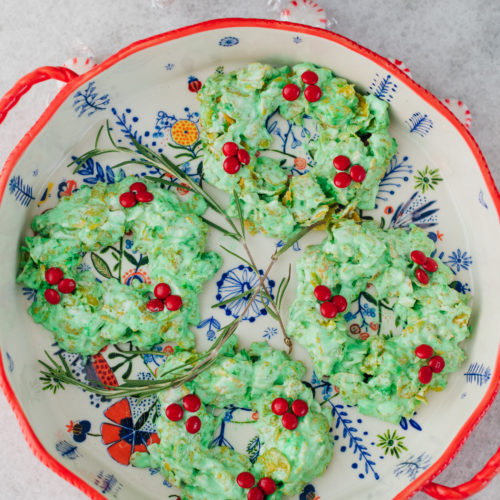
DAIRY-FREE MARSHMALLOW CORNFLAKE WREATHS
These require ZERO baking, and are sooooooooo cute! They’re a great Christmas dessert option if you have to bring something to someone’s house!
Ingredients…
(Makes 4-6 wreaths)
- 20 large marshmallows
- 2 tbsp unsalted butter
- green food coloring
- 3 cups cornflakes
- 2 tbsp red M&M’s minis
Instructions…
- Place marshmallows and butter into a microwave-safe bowl, and microwave (uncovered) on high for 45 seconds, or until butter is melted and marshmallows are soft and puffy.
- Add green food coloring drop by drop until you get the shade of green you prefer.
- Stir in cornflakes until well combined.
- Divide the mixture into eight portions and shape each portion into a 3″ wreath, and place onto the parchment paper-lined baking sheet.
- Decorate with M&M’s and let stand to set. Enjoy!
Dairy Free Marshmallow Cornflake Wreaths
Equipment
- Microwave Safe Bowl
- Microwave
- Baking Sheet
- Parchment Paper
Ingredients
- 20 large marshmallows
- 2 tbsp unsalted butter
- green food coloring
- 3 cups cornflakes
- 2 tbsp red M&M's Mini's
Instructions
- Place marshmallows and butter into a microwaves safe bowl, and microwave (uncovered) on high for 45 seconds, or until butter is melted and marshmallows are soft and puffy.
- Add green food coloring drop by drop until you get the shade of green you prefer.
- Stir in cornflakes until combined well.
- Divide the mixture into eight portions and shape each portion into a 3" wreath, and place onto the parchment paper lined baking sheet.
- Decorate with M&M's and let stand to set. Enjoy!
Nutrition
CHRISTMAS DESSERT #3:
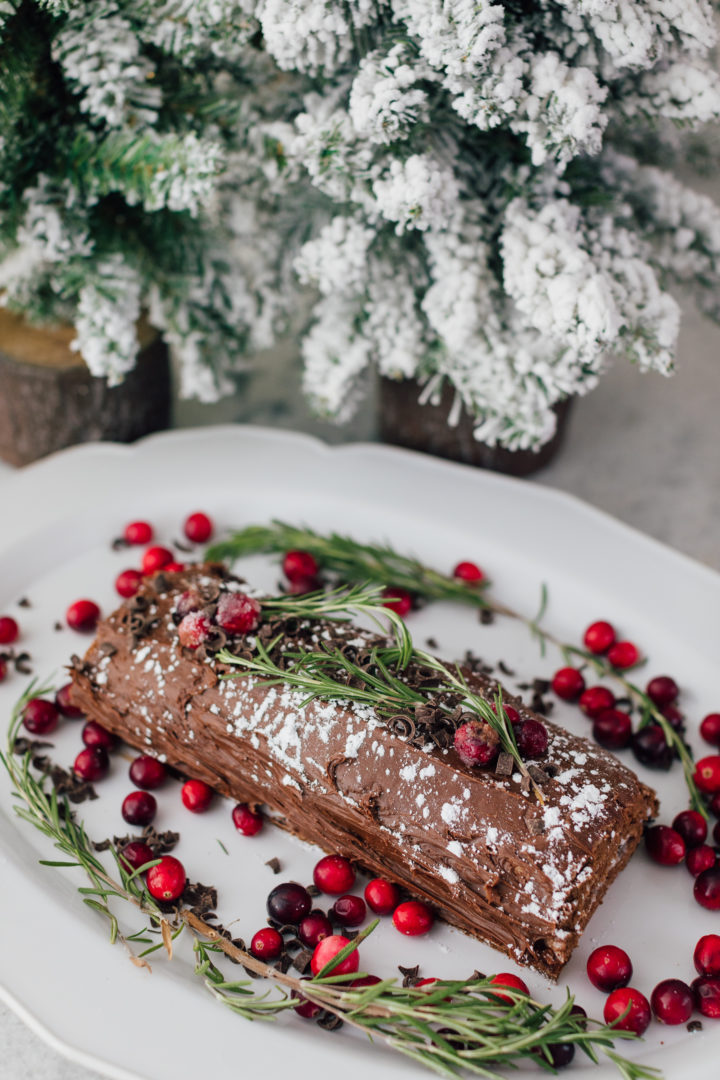
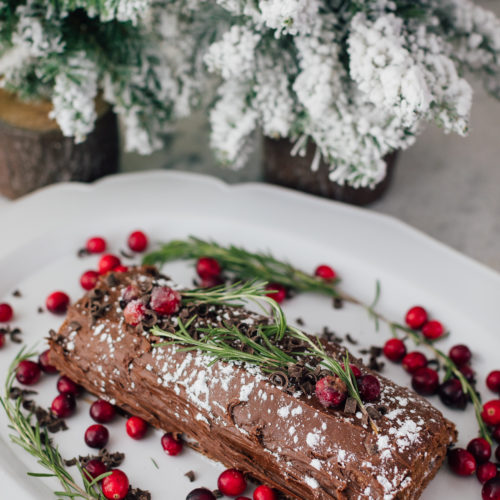
BÛCHE DE NOËL
This is the most gorgeous Christmas dessert to make for the holidays, but it’s definitely involved and takes a bit of time. If you have the patience, I cannot recommend a more beautiful edible centerpiece!
Ingredients…
For the cake…
- 6 large eggs, separated
- ½ cup all-purpose flour
- ¼ cup unsweetened cocoa powder
- ¾ cup sugar, divided into 2
- ¼ tsp salt
- powdered sugar, for sprinkling
For the filling…
- 1¼ cup unsweetened coconut cream
- ¼ cup powdered sugar
- 1 tsp pure vanilla extract
- 1 pinch salt
For decorating…
- ½ cup unsalted butter, softened
- 1½ cup powdered sugar, plus extra for garnish
- 5 tbsp unsweetened cocoa powder
- 1 tsp pure vanilla extract
- 3 tbsp unsweetened coconut cream
- 1 pinch salt
- cranberries, for garnish
- rosemary sprigs, for garnish
Instructions…
Make the cake…
- Preheat the oven to 350º F and line your jelly roll pan with parchment paper and then spray with cooking spray. You want this cake to eventually easily peel from the parchment paper, so don’t be shy with the grease.
- Meanwhile, in a medium mixing bowl, combine flour, cocoa powder, and salt set aside.
- Now it’s time to separate the eggs. If you’ve never separated eggs before, it’s best to use very cold eggs to do this so that you don’t unintentionally break the yolk. (This is my favorite method for how to separate eggs.)
- Once you’ve separated all six egg whites from the egg yolks into two separate bowls, pour the egg yolks into a stand mixer bowl.
- Beat the egg yolks until thick, and slowly add 1/2 cup of sugar and beat until pale.
- Once the egg yolk and sugar mixture is pale, slowly add in the flour mixture until combined well.
- Pour egg yolk, sugar, and flour mixture into a separate large mixing bowl, clean the stand mixer bowl, and return it to the stand mixer.
- Add the egg whites to the stand mixer bowl and beat until soft peaks form.
- Add remaining 1/4 cup of sugar to the egg whites slowly, continuing to beat until stiff peaks form.
- Gently fold egg whites into the egg yolk/sugar/flour mixture in a few batches, using a spatula to combine slowly, making sure not to collapse all the whites at once.
- Pour the batter into your prepared jelly roll pan and spread it until it evenly covers the entire surface.
- Pop your jelly roll pan into the oven for 12-14 minutes. The cake is ready when it bounces back slightly when you press on it.
- Remove the cake from the oven.
- Meanwhile, layout a clean kitchen towel on your counter and sprinkle it with a thin layer of powdered sugar using a fine-mesh sieve.
- Your cake should be separating away from the edges of your jelly roll pan, and if it needs help, take a butter knife or offset and carefully help it separate. The goal here is to have the cake still warm (having been out of the oven no more than 10 minutes max), but not attached to the pan at all. Remember what I said about the grease? This is why.
- Once you’re sure your cake is separated from the pan, align the pan edge next to your kitchen towel covered in powdered sugar and tilt the pan gently upwards on its side, so that you can carefully transfer the cake face down onto the sugar. Your kitchen towel will be bigger than your cake, so try to aim for the center of the towel.
- Once the cake is transferred, immediately remove the parchment paper from the bottom, and adjust the cake on the towel so that the towel appears like a frame around the edges of the cake.
- Using the short end of the kitchen towel, slowly and carefully roll the cake with the towel tightly into a log. Your towel should be rolled up with the cake, similar to how the filling with eventually lay rolled in the cake. Don’t worry, this is just so that we can cool the cake down in that shape and make it easier to re-roll it once we apply the filling.
Place your rolled-up cake and towel log back onto the jelly roll pan and place it in the coolest part of your kitchen/home to cool completely. Don’t put it in the fridge because it will dry out the cake and make it more likely that it will break when you unroll it. A dark, cool corner will work just fine.
Make the filling…
- Back to your stand mixer: Beat together your coconut cream, powdered sugar, vanilla extract, and a pinch of salt until peaks start to form. Once reaching whipped cream consistency, place it in the fridge until ready to use.
- When your rolled up cake and towel log are room temperature, carefully unroll the cake so it’s flat and take your whipped cream and spread it across the entire flat surface evenly.
- Using your kitchen towel, carefully roll your cake and the whipped cream back into a log shape it was in before, but this time, keep the towel out of the roll. The towel should remain on the outside, slowly and carefully helping the cake tightly roll itself into the log shape.
- Once the cake has been rolled up, tuck the top of the kitchen towel gently under the seam so that the log is wrapped tightly around by the towel. Place it back on the jelly roll pan and into the fridge for 1-2 hours, or up to overnight. The longer it sits in the fridge, the better set the cake and the whipped cream will be and the more flavorful the end result will be.
Make the frosting…
Now back to our stand mixer! Beat the butter until smooth. Add the powdered sugar and cocoa powder and beat until no lumps remain. Add the vanilla, coconut cream, and salt and combine everything until buttercream is smooth and no lumps remain.
Frost the cranberries…
Wet your hands and roll the cranberries in your palm and then drop them into a small bowl of granulated sugar. Toss them around until coated.
Assemble…
- Take your cake out of the fridge and dust off as much of the powdered sugar as you can because it will prevent the buttercream from sticking.
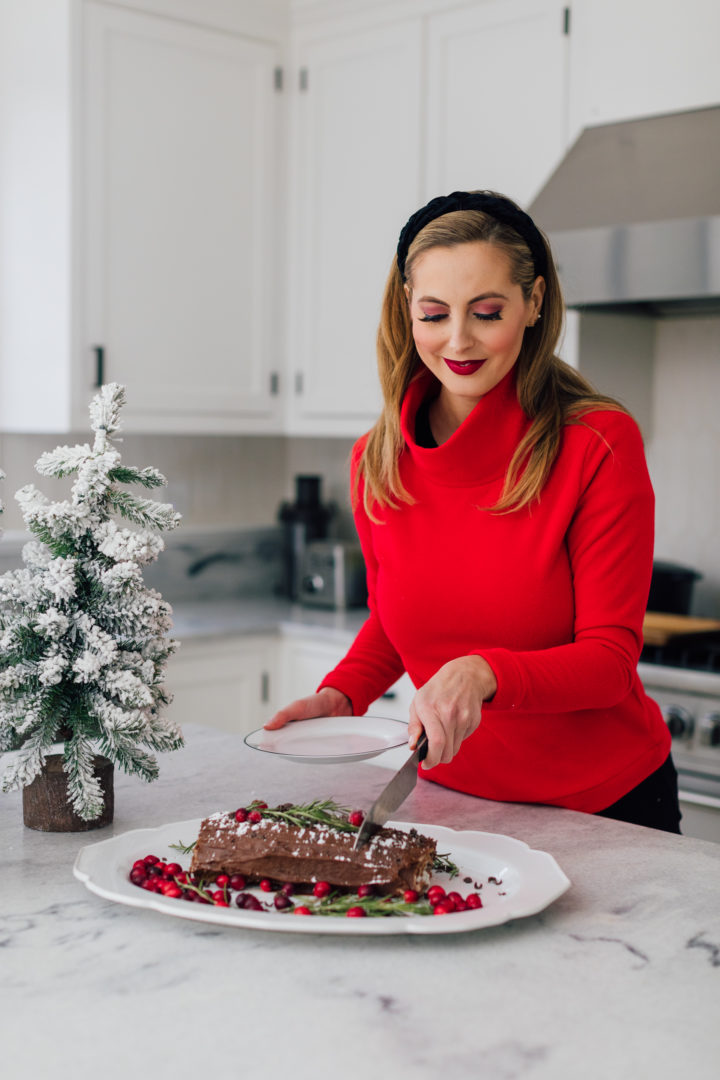
- Next, trim the ends of the log so it has a nice clean edge with which to admire all that hard work you did rolling that sucker up, LOL!
- Frost the entire log with the buttercream, dust lightly with powdered sugar, and add some rosemary sprigs for garnish, and some frosted cranberries, and serve!
Bûche de Noël
Equipment
- Jelly Roll Pan
- medium mixing bowl
- large mixing bowl
- Parchment Paper
- Cooking Spray
- Stand Mixer
- Kitchen Towel
- Fine Mesh Sieve
Ingredients
For the Cake:
- 6 large eggs, separated
- 1/2 cup all-purpose flour
- 1/4 cup unsweetened cocoa powder
- 3/4 cup sugar, divided into 2
- 1/4 tsp kosher salt
- powdered sugar, for sprinkling
For the Filling:
- 1 1/4 cup unsweetened coconut cream
- 1/4 cup powdered sugar
- 1 tsp pure vanilla extract
- 1 pinch kosher salt
For Decorating:
- 1/2 cup softened butter
- 1 1/2 cup powdered sugar, plus extra for garnish
- 5 tbsp unsweetened cocoa powder
- 1 tsp pure vanilla extract
- 3 tbsp unsweetened coconut cream
- 1 pinch kosher salt
- cranberries, for garnish
- rosemary sprigs, for garnish
Instructions
Cake:
- Preheat the oven to 350º F and line your jelly roll pan with parchment paper and then spray with cooking spray. You want this cake to eventually easily peel from the parchment paper, so don’t be shy with the grease.
- Meanwhile, in a medium mixing bowl, combine flour, cocoa powder, and salt, and set aside.
- Now it’s time to separate the eggs. If you’ve never separated eggs before, it’s best to use very cold eggs to do this so that you don’t unintentionally break the yolk.
- Once you’ve separated all six egg whites from the egg yolks into two separate bowls, pour the egg yolks into a stand mixer bowl.
- Beat the egg yolks until thick, and slowly add 1/2 cup of sugar and beat until pale.
- Once the egg yolk and sugar mixture is pale, slowly add in the flour mixture until combined well.
- Pour egg yolk, sugar and flour mixture into a separate large mixing bowl, clean the stand mixer bowl, and return it to the stand mixer.
- Add the egg whites to the stand mixer bowl and beat until soft peaks form.
- Add remaining 1/4 cup of sugar to the egg whites slowly, continuing to beat until stiff peaks form.
- Gently fold egg whites into the egg yolk/sugar/flour mixture in a few batches, using a spatula to combine slowly, making sure not to collapse all the whites at once.
- Pour the batter into your prepared jelly roll pan and spread it until it evenly covers the entire surface.
- Pop you jelly roll pan into the oven for 12-14 minutes. The cake is ready when it bounces back slightly when you press on it.
- Remove the cake from the oven. Meanwhile, lay out a clean kitchen towel on your counter and sprinkle it with a thin layer of powdered sugar using a fine mesh sieve.
- Your cake should be separating away from the edges of your jelly roll pan, and if it needs help, take a butter knife or offset and carefully help it separate. The goal here is to have the cake still warm (having been out of oven no more than 10 minutes max), but not attached to the pan at all. Remember what I said about the grease? This is why.
- Once you're sure your cake is separated from the pan, align the pan edge next to your kitchen towel covered in powdered sugar and tilt the pan gently upwards on its side, so that you can carefully transfer the cake face down onto the sugar. Your kitchen towel will be bigger than your cake, so try to aim for the center of the towel.
- Once the cake is transferred, immediately remove the parchment paper from the bottom, and adjust the cake on the towel so that the towel appears like a frame around the edges of the cake.
- Using the short end of the kitchen towel, slowly and carefully roll the cake with the towel tightly into a log. Your towel should be rolled up with the cake, similar to how the filling with eventually lay rolled in the cake. Don't worry, this is just so that we can cool the cake down in that shape and make it easier to re-roll it once we apply the filling.
- Place your rolled up cake and towel log back onto the jelly roll pan and place it in the coolest part of your kitchen/home to cool completely. Don't put it in the fridge because it will dry out the cake and make it more likely that it will break when you unroll it. A dark, cool corner will work just fine.
Filling:
- Back to your stand mixer: Beat together your coconut cream, powdered sugar, vanilla extract, and a pinch of salt until peaks start to form. Once reaching whipped cream consistency, place it in the fridge until ready to use.
- When your rolled up cake and towel log are room temperature, carefully unroll the cake so it's flat and take your whipped cream and spread it across the entire flat surface evenly.
- Using your kitchen towel, carefully roll your cake and the whipped cream back into a log shape it was in before, but this time, keep the towel out of the roll. The towel should remain on the outside, slowly and carefully helping the cake tightly roll itself into the log shape.
- Once the cake has been rolled up, tuck the top of the kitchen towel gently under the seam so that the log is wrapped tightly around by the towel. Place it back on the jelly roll pan and into the fridge for 1-2 hours, or up to overnight. The longer it sits in the fridge, the better set the cake and the whipped cream will be and the more flavorful the end result will be.
Frosting:
- Now back to our stand mixer! Beat the butter until smooth. Add the powdered sugar and cocoa powder and beat until no lumps remain. Add the vanilla, coconut cream, and salt and combine everything until buttercream is smooth and no lump remain.
Frosted Cranberry Garnish:
- Wet your hands and roll the cranberries in your palm and then drop them into a small bowl of granulated sugar. Toss them around until coated.
Serving:
- Take your cake out of the fridge and dust off as much of the powdered sugar as you can because it will prevent the buttercream from sticking.
- Next, trim the ends of the log so it has a nice clean edge with which to admire all that hard work you did rolling that sucker up! LOL
- Frost the entire log with the buttercream, dust lightly with powdered sugar, and add some rosemary sprigs for garnish, and some frosted cranberries, and serve!
Nutrition


Shop the post…
[show_shopthepost_widget id=”3850534″]
Photographs by Julia Dags | Happily Eva After, Inc. © 2020 All Rights Reserved

YUM! and how gorgeous! Thanks for sharing!
Eva – you read my mind! I woke up this morning thinking “I need holiday dessert ideas” and these are perfect! I assume the wreath recipe makes 4, but wanted to ask. Thank you for sharing 🙂
Hi! Excited to make the wreaths! You say dairy free however they are made with butter- did you try them with a butter alternative too? That would be the route I need to go. Thanks!
Yeah I always use Earth Balance!